How to Take Product Photos That Sell Without a Studio
Before we dive into the "how-to" of taking product photos, let's get one thing straight: your product images are your single most important sales tool. In the world of e-commerce, they're the digital handshake between your brand and your customer. Great photos build trust, showcase quality, and are often the final nudge someone needs to click "buy."
Why Great Product Photos Are Your Best Sales Tool

Think about it. In a brick-and-mortar store, people can pick up an item, feel its weight, and inspect it from every angle. Online, your photos have to do all of that heavy lifting. They're the only way to bridge the gap between a customer's screen and their hands, giving them the visual information they need to feel confident about their purchase.
If your photos are blurry, poorly lit, or all over the place stylistically, it sends a bad message. It can make your whole operation look unprofessional, eroding trust before a shopper even gets to your product description.
The Psychology of Visual Commerce
The human brain is wired for visuals. In fact, it processes images 60,000 times faster than plain text. This means a potential customer forms an opinion about your product in a split second, based almost entirely on your photography. High-quality visuals instantly signal value and credibility.
This isn't just a hunch; the numbers don't lie. A staggering 9 out of 10 online shoppers say high-quality photos are critical to their buying decisions. We've seen products with professional-looking images boost their conversion rates by up to 33% compared to those with amateur shots. When you realize that 75% of shoppers rely on product images to make a final judgment, the connection between good photos and good sales becomes undeniable.
Your product photo isn’t just showing an item; it’s selling an experience. It needs to answer questions, build desire, and make the customer feel confident in their choice.
Turning Clicks into Conversions
Great product photography is more than just a pretty picture; it’s a strategic asset that works hard for your business.
Here's what your photos should be doing for you:
- Build Brand Identity: A consistent look—from lighting to backgrounds—creates a cohesive brand that people start to recognize and trust.
- Communicate Quality: Sharp, detailed images let you show off the craftsmanship and high-quality materials, justifying your price.
- Reduce Returns: When photos are accurate, customers know exactly what they’re getting. No surprises, fewer returns.
- Tell a Story: Lifestyle shots are powerful. They help customers imagine the product in their own lives, forging an emotional connection that is key to making a sale.
To really get the most out of your images, think about how they fit into your overall visual merchandising guidelines. Your online store is your digital storefront, and every image contributes to the vibe. Learning how to take product photos isn't just a creative skill—it's a core business strategy for anyone serious about succeeding online.
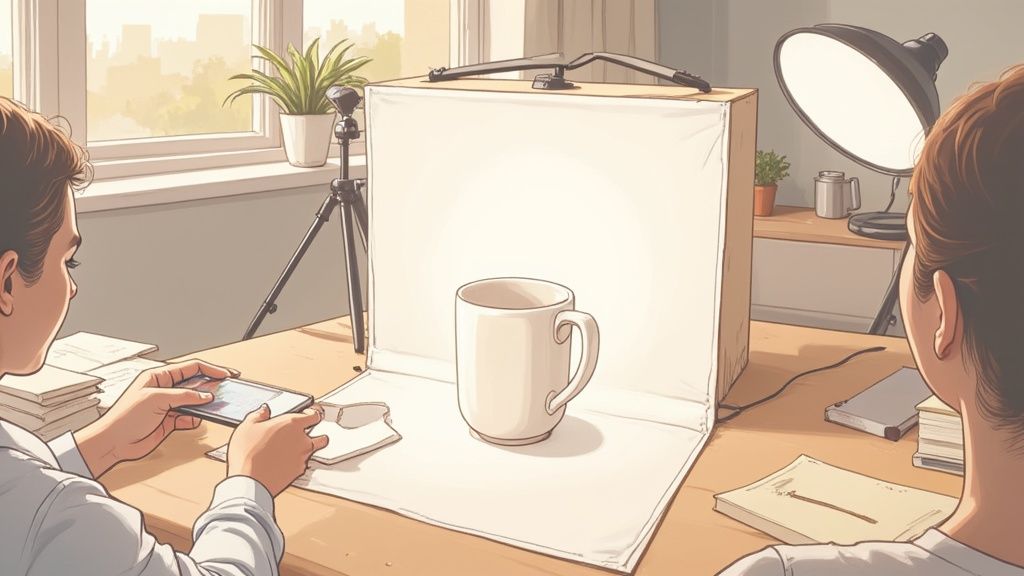
Building Your DIY Photography Setup on a Budget
It's a common myth that you need a room full of expensive gear to get great product photos. Truthfully, what separates a fantastic shot from a mediocre one isn't the price tag of your equipment—it’s how you use what you have. You can get stunning, professional-looking results with a few simple items, many of which you might already own.
The best camera for the job? It’s probably the one in your pocket. Modern smartphone cameras are absolute powerhouses, packed with high-resolution sensors and smart software that make them perfect for this kind of work. So, let go of the idea that you need a bulky DSLR to get started. Your phone is more than up to the task.
The real game-changer isn't the camera itself, but how you control the environment around your product. This is where a clever, low-cost setup makes all the difference.
The Essentials You Actually Need
When you first dive into product photography, it's easy to feel buried under endless lists of "must-have" gadgets. I've been there. In reality, you only need a handful of core items to build an effective mini-studio right in your own home.
This simple workflow shows just how straightforward it is to get started, from grabbing your gear to snapping that first picture.

As you can see, the process isn't about fancy equipment. It’s about creating a stable, clean, and repeatable environment for your products to shine.
Creating Your Backdrop and Light Box
The single most important piece of your setup is a seamless white background. It’s the key to making your product the undeniable hero of the shot by cutting out all the noise and distractions. Forget expensive photography sweeps; a large piece of white poster board or foam core from any craft store is your best friend here.
Setting it up is simple. Just find a small table or chair near a window that gets good, natural light. Place your poster board on it, then gently curve the back of it up against the wall. A couple of pieces of tape at the top will hold it in place, creating a smooth, corner-free "infinity" background. This little trick instantly elevates your photos, giving them a clean, studio-like feel.
Want to take your lighting to the next level? You can even build a DIY light box. All it takes is a cardboard box. Cut out the top and sides, then cover the openings with white tissue paper or a thin white cloth. This diffuses the light, wrapping your product in a soft, even glow that kills harsh shadows. For more tips, check out our in-depth guide to building a complete DIY product photography setup.
A consistent background does more than just look good; it builds brand recognition. When every product is shot in the same clean environment, your online store feels cohesive, professional, and trustworthy.
Stabilizing Your Camera for Sharp Images
No matter how steady you think your hands are, there’s always a tiny bit of shake that can lead to blurry photos. In product photography, sharpness is everything. That’s why stabilizing your camera is absolutely non-negotiable.
A tripod is your best bet. You can find perfectly good, lightweight tripods with smartphone mounts for as little as $25 online. This small investment pays for itself almost immediately by guaranteeing every single shot is perfectly crisp. It also lets you lock in your camera angle, which is a huge help for maintaining consistency when shooting multiple products.
If a tripod isn't in the cards right now, no problem. A stack of books, a sturdy box—anything flat and stable will work in a pinch. The trick is to rest your phone on the object instead of holding it. Then, use your phone’s self-timer (2 or 3 seconds is perfect). This prevents the camera shake that happens when you tap the screen to take the picture.
Here’s a quick breakdown of your gear options:
| Gear Category | The 'Must-Have' (Budget) | The 'Nice-to-Have' (Upgrade) |
|---|---|---|
| Camera | A modern smartphone | A DSLR or mirrorless camera |
| Stability | A stack of books + self-timer | A sturdy tripod with a phone mount |
| Backdrop | White poster or foam board | Professional vinyl or paper sweep |
| Lighting | Natural light from a window | A set of softbox lights |
By starting with these budget-friendly essentials, you'll master the fundamentals of lighting and composition. Once you have the basics down, you can decide which upgrades—if any—will truly make a difference for your workflow and final images.
Getting Lighting and Composition Right

If your camera is the paintbrush, then light and composition are your canvas and technique. These two elements form the absolute bedrock of great product photography. Get them right, and you can make a simple smartphone shot look like it came from a high-end studio.
Think of it this way: lighting shapes what the customer sees, and composition guides where they look. One defines the mood and clarity; the other creates focus and tells a story. Nailing both is what separates an average snapshot from a photo that actually drives sales.
Harnessing the Power of Light
Light is the language of photography. To get fluent, you first need to understand its two main dialects: hard light and soft light.
Hard light, like direct, unfiltered sunlight, creates sharp, well-defined shadows. While it can be dramatic, it’s often too harsh for product shots. It has a nasty habit of highlighting tiny imperfections and casting distracting, ugly shadows that obscure your product.
Soft light, on the other hand, is your best friend. It’s diffused, meaning it wraps around your product gently, softening shadows and creating a clean, even, and flattering look. This is the gold standard for e-commerce, and the good news is you can create it for next to nothing.
Your best source of high-quality soft light is a large window on an overcast day. But what if it's sunny? You just need to diffuse that harsh light.
- Hang a thin white bedsheet or sheer curtain over the window.
- Tape a piece of parchment paper or tracing paper to the glass.
- Just like that, you’ve turned a harsh light source into a giant, professional softbox.
The goal is to create a light source that is large and soft relative to your product. A bigger, more diffused light will produce softer shadows and a more professional look. It's a simple trick that works every single time.
Bending Light to Your Will
Once you have a good source of soft light, the next step is to control it. Position your setup so the light hits your product from the side, at roughly a 45-degree angle. This technique, called side-lighting, is perfect for creating a subtle sense of depth and dimension without those harsh shadows.
You'll probably notice the side of your product opposite the window is a little dark. That's where a reflector comes in. A reflector is just a white surface you use to bounce light back into the shadows, brightening them up and revealing more detail.
You don’t need to buy anything fancy. A simple piece of white foam core or even a sturdy piece of white paper propped up on the shadow side of your product works wonders. By moving this "bounce card" closer or further away, you can precisely control how bright the shadows become.
Arranging Your Shot for Impact
With your lighting sorted, it’s time to think about composition—the art of arranging elements within the frame. Strong composition guides the viewer’s eye directly to your product's most important features.
A simple yet powerful principle to start with is the rule of thirds. Imagine your screen is divided into a 3x3 grid, like a tic-tac-toe board. The rule suggests that placing your main subject along these lines, or where they intersect, creates a more balanced and visually interesting photo than just plunking it in the center.
Another crucial concept is negative space—the empty area around your product. Don't be afraid of it! Giving your product some breathing room makes it feel more important and less cluttered, drawing the customer’s eye right where you want it. For a deeper dive, you can explore different ideas for the best background for product photography to complement your composition.
Finding the Perfect Angle
The angle you shoot from completely changes the story your photo tells. A shot from above can emphasize a product's shape, while a straight-on shot can feel bold and direct.
Here are a few angles to experiment with for your product photos:
- The Eye-Level Shot: This is a direct, head-on angle. It’s clear, honest, and great for showing the product exactly as a customer would see it standing on a shelf.
- The High Angle (45-Degree): Shooting from slightly above gives a great overview of the product, showing its top and front surfaces at the same time. It’s a very common and effective angle for e-commerce.
- The Flat Lay (Top-Down): This overhead shot is perfect for arranging multiple items, showing off a kit, or creating a styled scene for apparel, food, or accessories.
- The Detail Shot: Get in close! Use your camera’s macro mode (or just zoom in) to capture the fine details—the texture of a fabric, the engraving on a piece of jewelry, or the quality of the stitching. These shots build immense trust.
By combining soft, controlled lighting with intentional composition, you're not just taking a picture. You're crafting a persuasive visual argument for why your product is the one worth buying.
Fine-Tuning Your Shots for Different Products
Once you get the hang of basic lighting and composition, you'll hit the next big challenge: not all products play by the same rules. A fluffy sweater and a high-polish chrome teapot require completely different game plans. Getting great product photos is all about becoming a problem-solver, learning how to adapt your setup to handle common hurdles like reflections, texture, and scale.
This doesn't mean you need a whole new studio for every item you sell. It’s about making small, smart adjustments to your lighting, camera angle, and styling to make each product’s best qualities pop. A few simple tweaks can be the difference between a photo that just shows an item and one that truly sells it.
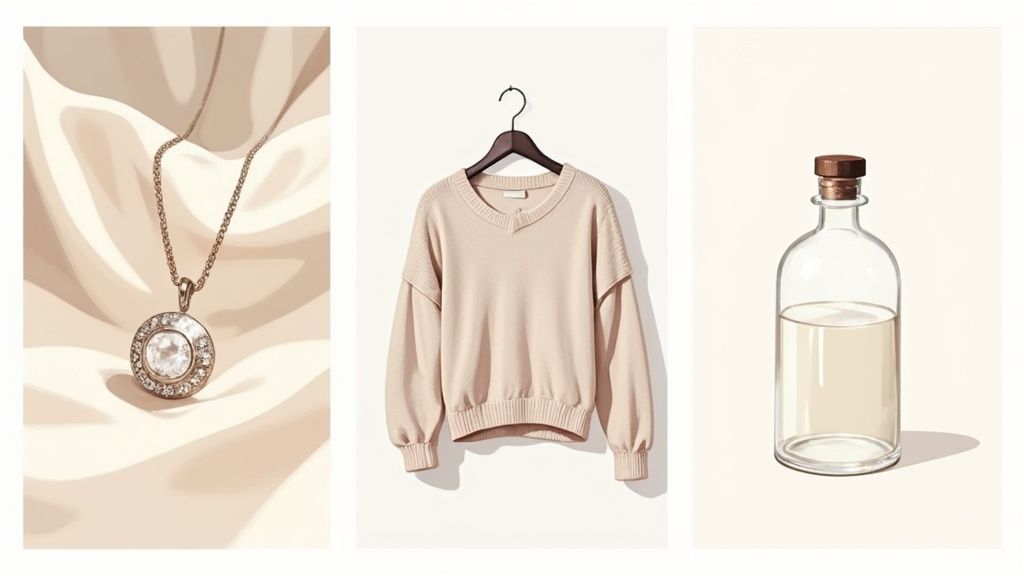
Conquering Reflections on Shiny Surfaces
Photographing jewelry, glassware, or anything with a glossy finish is a classic headache. These surfaces act like mirrors, reflecting you, your camera, and the clutter in your room. The trick isn't to get rid of reflections completely—that would make the object look flat and weird—but to control what’s being reflected.
Diffusion is your best friend here. By placing large white foam boards or even clean bedsheets on either side of your product (just outside the camera's view), you essentially build a clean, white "room" for the product to reflect. This replaces distracting reflections with smooth, appealing highlights that perfectly define the object's shape.
A few specific adjustments can make a huge difference:
- For Jewelry: Get up close with your camera's macro mode to capture those tiny, intricate details. I find that using one large, soft light source and surrounding the piece with white bounce cards creates a cocoon of light. The result is soft, elegant highlights instead of harsh glares.
- For Glassware: A see-through glass can easily disappear into a white background. To fix this, place a piece of black cardstock behind it, just out of the frame. This creates a crisp, dark edge that makes the shape of the glass stand out beautifully.
Showcasing Texture and Detail
When you're selling things like clothing, textiles, or handcrafted wooden items, the texture is a huge part of the appeal. Your photos have to communicate that tactile quality so customers can almost feel it through their screen. Flat, head-on lighting is your worst enemy here; it will wash out all those interesting details.
The secret is all in the side-lighting. Position your main light source at a low angle from the side, and you’ll create tiny shadows across the surface that emphasize every thread, grain, and weave.
A single light source placed at a 45-degree angle to the side and slightly above your product is the perfect place to start. This approach reveals depth and dimension, making textures pop and giving the product a much more three-dimensional feel.
This technique is a game-changer for making fabric look rich and luxurious, showing off the grain in a wooden bowl, or highlighting the brushstrokes on a piece of art. Don't be afraid to move your light around and watch how the shadows change until the texture looks just right.
Conveying Scale for Any Product
One of the biggest uncertainties for online shoppers is figuring out a product's real size. Is that backpack a tiny keychain or a massive hiking pack? This is where scale shots are absolutely invaluable.
Including a familiar object or a human element in at least one of your shots provides an immediate frame of reference. This simple step helps manage customer expectations and can dramatically cut down on returns from people who thought an item was bigger or smaller.
Here are a few practical ways to show scale:
- Small Items: Place tiny products like earrings or figurines next to a coin, or even better, show them in someone's hand.
- Apparel: Always show clothing on a mannequin or, ideally, a model. This doesn't just show the size; it also demonstrates the fit and drape, answering several customer questions in a single image.
- Furniture and Decor: Style these pieces in a real-life setting. A photo of a throw pillow on a couch or a vase on a bookshelf immediately tells you everything you need to know about its size in a relatable way.
Styling for Story and Context
Beyond the clean, technical shots on a white background, lifestyle photos help customers imagine your product in their own lives. This is where you get to tell a story and create an emotional connection.
When you're styling a lifestyle shot, remember that less is often more. Every prop you add should support the main product, not compete with it. For a handmade coffee mug, props like a bag of artisan coffee beans and a cozy blanket create a warm, inviting vibe. For a tech gadget, a clean desk with a nice notebook and pen can suggest productivity and focus.
The goal is to create a scene that feels authentic to your brand and speaks directly to your ideal customer. Once you master these adaptive techniques, you can confidently shoot any product in your catalog, knowing every image is working hard to build trust and drive sales.
Polishing Your Images with Editing and AI
https://www.youtube.com/embed/w9hDGI4QuvE
Taking the shot is only the beginning. The real magic happens in post-production, where a good photo transforms into a truly great one. This is where you iron out the small imperfections, nail the color accuracy, and develop a consistent, professional look that builds genuine brand trust. It’s that final polish that separates an amateur snapshot from a high-converting product image.
Think of editing less as a rescue mission for bad photos and more as an enhancement for good ones. The mission is simple: make your product look its absolute best while staying true to reality. Even a few simple adjustments can elevate your entire catalog, making your online store feel more cohesive and dependable.
Essential Edits for Every Photo
You don't need to be a Photoshop guru to get professional results. In fact, most of the heavy lifting can be done with free apps like Lightroom Mobile or even the editor built right into your phone. The trick is to focus on a handful of fundamental tweaks that deliver the biggest bang for your buck.
Here’s a straightforward workflow I follow for just about every image:
- Crop and Straighten: First thing's first—make sure your product is centered and the lines are straight. A slightly crooked photo can look sloppy and rushed. This one simple fix instantly tidies up the entire composition.
- Adjust Exposure and Contrast: Gently brighten the image just enough to make your product pop without blowing out the highlights. A tiny boost in contrast helps define the edges and adds a bit of depth, making the product feel more tangible to the viewer.
- Correct the White Balance: This is, without a doubt, one of the most crucial steps. If the "white" background in your photo has a yellow or blue tint, your product colors will be off. Use your editor’s white balance or temperature slider to get the whites looking pure and neutral. This ensures your customers see the true color of what they’re buying.
- Sharpen Lightly: Apply just a touch of sharpening to bring out fine textures and details. Go easy here—overdoing it can create a grainy, artificial look that cheapens the photo.
Your editing philosophy should be "accurate, not aesthetic." The goal is to present a clean, bright, and true-to-life version of your product. Steer clear of heavy filters that distort colors, as that’s a fast track to customer dissatisfaction and returns.
Getting Your Images Ready for AI
Once you've got a clean, well-edited base image, it's time to let artificial intelligence take it to the next level. AI tools are no longer reserved for tech giants; they're incredibly accessible resources that can save you countless hours and unlock amazing creative possibilities. But to get the best results, you need to feed the AI a quality image to start with.
An "AI-ready" photo is nothing complicated—it’s just a clear, well-lit image of your product, ideally against a simple backdrop. The better the source image, the more stunning the AI-generated results will be.
What Makes an Image 'AI-Ready'?
- A Clear Subject: The product is in sharp focus, with no motion blur.
- Good Lighting: Your product is evenly lit, free of harsh shadows or blown-out highlights that hide its shape.
- Clean Separation: The product stands out clearly from the background, making it a breeze for the AI to isolate.
When you start with a solid photo, you set the stage for powerful AI tools to instantly generate brand-new, studio-quality backgrounds. This is how you can place your product on a minimalist marble surface, in a lush outdoor scene, or anywhere else you can imagine—all without a physical studio. For a deeper dive into this process, our guide on AI product photography shows just how these tools can transform your workflow.
Today's technology has even pushed product visuals into exciting new territory, like virtual clothing try-on apps that use sophisticated imaging to improve the shopping experience. This just goes to show how critical high-quality, well-prepared images are in modern e-commerce. By mastering basic editing and prepping your shots for AI, you're not just improving your photos—you're future-proofing your brand's entire visual strategy.
Got Questions About Product Photography? We've Got Answers.
As you start taking your own product photos, you'll inevitably run into a few snags. It's one thing to read about lighting and composition, but it's another thing entirely to troubleshoot those little problems that pop up during a real shoot.
Let's walk through some of the most common questions we hear from sellers who are just getting started. Getting these details right is what separates an amateur shot from a professional one.
How Many Pictures Do I Actually Need for One Product?
While there's no single magic number, a great target is at least 5-7 photos for each product you list. This gives shoppers a complete view from all sides, building trust and showing them exactly what they're getting.
Think of your photos as telling a story. Here's a proven lineup that works for almost any product:
- The Hero Shot: Your main image. A clear, front-and-center view of the product, usually on a simple, neutral background.
- Different Angles: Be sure to show the back, sides, and a classic 45-degree angle. Let the customer see everything.
- The Detail Shot: Zoom in! Highlight a unique texture, a well-made seam, or a special feature they might otherwise miss.
- The Scale Shot: Show the product next to a familiar object (like a coin or a coffee mug) or in someone's hand. This helps customers instantly understand its size.
- The Lifestyle Shot: Put the product in a real-world setting. This helps buyers imagine it in their own lives, which is a powerful selling tool.
My Photos Have a Weird Yellow (or Blue) Tint. What's Going On?
That's almost always a white balance problem. Your camera is trying to guess the "color" of the light in your space and is getting it wrong. The number one cause? Mixing light sources, like the natural sunlight from a window and the warm, yellowy light from a ceiling fixture.
Here's the fix: Turn off all the indoor lights. Stick to one single source of light—ideally, the soft, diffused light from a window. If your whites still look a little off, you can easily adjust it later. Just look for the "White Balance" or "Temperature" slider in your editing app and tweak it until the white areas in your photo look pure white.
Why Do My Photos Keep Coming Out Blurry?
Blurry photos typically boil down to two culprits: a dirty lens or camera shake. It sounds too simple, but before you start any shoot, give your smartphone's camera lens a quick wipe with a microfiber cloth. You'll be shocked at how much smudging and dust can accumulate.
The other major cause is the tiny, unavoidable movement that happens when you hold your phone. Our hands are never perfectly still, and that tiny shake is enough to ruin a shot. A tripod is your best friend here; it guarantees tack-sharp images every single time. No tripod? No problem. Just prop your phone up on a stack of books and use the self-timer. This lets you snap the picture without even touching the screen.
Ready to take those sharp, clear photos and give them a professional, studio-quality finish? QuickPixel uses AI to instantly generate perfect backgrounds, saving you a ton of time and making your products look irresistible. Upload your images and let our tech do the heavy lifting. Discover how QuickPixel can transform your product photography.
Try QuickPixel Today
Get started with our AI-powered image generation tools