How to Make Product Photos Look Professional | Expert Tips
If you want your product photos to look truly professional, it comes down to mastering three things: soft, diffused lighting, thoughtful composition, and consistent editing. Forget about needing a high-end camera for a minute. The real secret is in how you take the picture, not just the gear you use to do it.
Why Professional Product Photos Are a Game-Changer
In the world of ecommerce, your product photos do all the heavy lifting. They’re your digital storefront, your best salesperson, and your brand's first impression, all wrapped into one. For many shoppers, these images are the first—and sometimes only—way they'll interact with what you sell. This isn't just about showing off a product; it’s about creating immediate trust and conveying its value before a customer even reads the first word of your description.
Low-quality, amateur-looking photos can actively hurt your business. When images are dark, blurry, or shot against a distracting background, they send a message of unprofessionalism. This can make potential buyers second-guess the quality of your product itself. On the flip side, clean, bright, and sharp photos instantly signal quality and build confidence.
The Clear Link Between Photos, Trust, and Sales
The connection between great photos and sales isn't just a gut feeling—the numbers prove it. We've seen firsthand how products with high-quality, professional images get a major boost in sales. In fact, a recent study found that products with excellent images see a 33% higher conversion rate compared to those with poor visuals. That's because online shoppers depend on photos to judge a product’s quality and make their final decision.
A visual-first strategy delivers some powerful benefits:
- Boosts Customer Confidence: Professional photos answer questions before they're even asked, showing off details, texture, and scale that reduce a buyer's hesitation.
- Lowers Return Rates: When your photos accurately show what the customer is getting, satisfaction goes up, and returns go down.
- Builds a Stronger Brand: A consistent and professional photography style creates a cohesive brand identity that customers start to recognize and trust.
The bottom line is simple: investing in your product photography is a direct investment in your sales. High-quality visuals are essential to how to improve ecommerce conversion rates and build a thriving online business.
The journey from amateur to professional-looking product photos is built on a few core pillars. Understanding these concepts is the first step toward transforming your images from simple snapshots into compelling sales tools.
Core Pillars of Professional Product Photography
| Pillar | Why It Matters for a Professional Look | Quick Tip |
|---|---|---|
| Lighting | Soft, diffused light eliminates harsh shadows and highlights product details cleanly. It's the #1 indicator of a professional shot. | Use a large window on an overcast day for beautiful, free natural light. |
| Composition | How you arrange the product in the frame directs the viewer's eye and creates visual interest. It tells a story beyond just showing the item. | The Rule of Thirds is a classic for a reason. Place your product slightly off-center for a more dynamic and balanced image. |
| Background | A clean, non-distracting background keeps the focus entirely on the product. Consistency here is key for a cohesive brand look. | A simple white or light gray seamless paper background is versatile and always looks professional. |
| Editing | Post-production editing ensures consistency in color, brightness, and sharpness across all your images, creating a polished, unified catalog. | Create a preset in your editing software to apply the same adjustments to all photos from a shoot, ensuring a consistent look. |
Mastering these four areas will fundamentally change the quality of your product photography and, in turn, how customers perceive your brand.
You Can Do This (Really)
Getting that professional look isn't just for big brands with massive budgets. The fundamentals of great photography—lighting, composition, and editing—are skills anyone can learn. To get a broader understanding of the techniques involved, it's worth exploring guides on how to take pictures professionally. In this guide, we're going to break down these core ideas into practical, actionable steps you can start using today to turn your product shots into powerful sales drivers.
Getting Your Lighting and Background Right
If there’s one thing that separates an amateur snapshot from a professional product photo, it’s lighting. It's not about dropping a fortune on fancy gear; it’s about learning to shape light to get rid of ugly shadows and really make your product’s features pop. The right background is just as crucial—it makes sure your product is the undisputed star of the show.
So many sellers get hung up on needing a full-blown studio, but that’s a myth. You can get incredible results with what you already have, starting with the biggest and best light source available: the sun.
Natural vs. Artificial Light
First, you'll need to decide between using natural light from a window or setting up some artificial lights. Both paths can lead to gorgeous photos, but they're suited for different situations.
- Natural Light: When you're just starting out, this is your secret weapon. It’s free, it’s everywhere, and it gives photos a soft, beautiful quality. The trick is to use indirect light. You don't want the sun blasting directly onto your product. A big, north-facing window on a slightly overcast day is the holy grail—it provides soft, even lighting that barely needs any tweaking. The "golden hour," right after sunrise or just before sunset, is also fantastic for a warm, inviting glow.
- Artificial Light: This route gives you total control. You can shoot day or night and get the exact same look every single time. Professional strobes can be a serious investment, but you don't need them. You can build an amazing DIY product photography setup with a couple of cheap clamp lights from the hardware store and some daylight-balanced LED bulbs. Just look for a color temperature around 5000K to mimic natural daylight.
No matter which light source you choose, remember this: soft, diffused light is always the goal. Harsh, direct light is the enemy. It creates dark, distracting shadows and glaring hotspots that make your product look cheap.
Simple Tools for Pro-Level Lighting
You only need a couple of inexpensive items to really control your light and take your photos to the next level. These tools will help you soften harsh light and fill in shadows, giving you that polished, professional look.
A simple sheer white curtain over a window can work wonders. It acts as a giant diffuser, scattering the light just like a pro softbox does. This one simple hack can instantly improve your photos.
Another must-have is a piece of white foam board from any craft store. When you place it opposite your main light source, it becomes a reflector. It bounces soft light back onto the shadowed side of your product, "filling in" those dark spots. This reveals more detail and gives you a much more balanced and appealing image.
Choosing the Perfect Background
With your lighting dialed in, it’s time to think about the background. A cluttered or distracting background can ruin even the most perfectly lit shot.
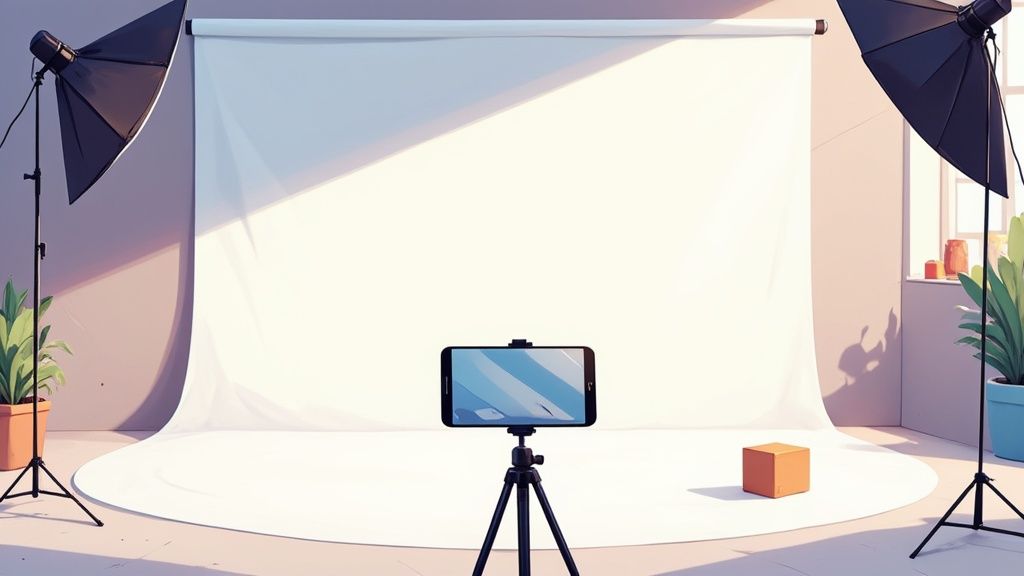
For that classic, clean e-commerce look, you can't go wrong with a white sweep. You can make one in minutes by taping a large sheet of white poster board to a wall and letting it curve gently down onto your table. This creates that seamless "infinity" background where your product looks like it’s floating in a clean, professional space.
But white isn’t your only choice. The right background can help tell your brand's story.
- A rustic wooden plank can feel perfect for handmade or natural goods.
- A slab of polished marble can add a touch of luxury to jewelry or cosmetics.
- A solid, muted color can be used to reinforce your brand's unique aesthetic.
The rule of thumb is simple: your background should always complement your product, never compete with it for attention. Using a consistent background style across all your product listings is key to building a brand that looks cohesive and trustworthy.
Essential Camera and Composition Techniques
You don't need the most expensive DSLR on the market to get professional-looking product photos. Honestly, the camera you already have in your pocket is probably more than capable. The real secret isn't the gear; it's learning to step away from the "Auto" setting with confidence. A few core principles will completely change your images, whether you're using a smartphone or a top-tier camera.
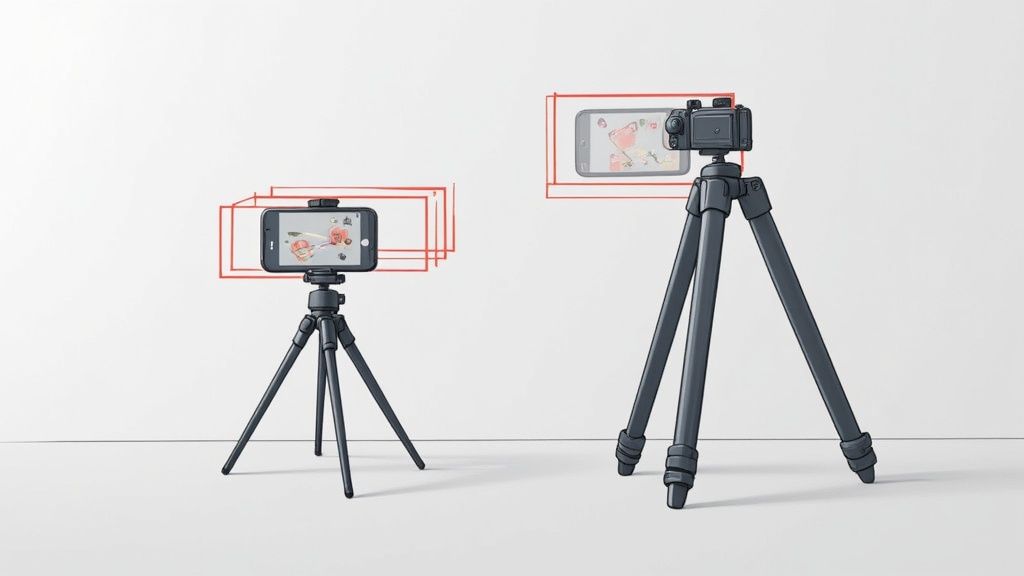
If I could recommend just one piece of equipment, it would be a tripod. It's the single most impactful tool for getting crystal-clear, sharp photos. Even if you think you have steady hands, tiny, unavoidable movements cause subtle blurriness. A simple, affordable tripod gets rid of that problem entirely, making sure every shot is perfectly crisp.
Getting a Handle on the Exposure Triangle
To really take control of your shots, you need to understand what photographers call the "exposure triangle." It's just a way of talking about three settings that work together to control how bright or dark your photo is: aperture, ISO, and shutter speed.
- Aperture (f-stop): This is all about how much of your image is in focus. A low f-stop number, like f/2.8, creates that beautiful, blurry background effect (shallow depth of field) you see in lifestyle shots. For classic product-on-white photos where every detail needs to be seen, you'll want a high f-stop number, like f/11, to keep everything sharp from front to back.
- ISO: This is your camera's sensitivity to light. My advice? Keep your ISO as low as it can go (usually ISO 100). This gives you the cleanest, most detailed images possible. The only time you should raise it is if you're stuck in a dark environment and don't have your tripod.
- Shutter Speed: This is simply how long the camera's sensor is exposed to light. A fast shutter speed freezes motion, while a slow one can introduce blur. The great thing about using a tripod is that you can use a much slower shutter speed to let in more light without ever worrying about a shaky, blurry photo.
My Go-To Starting Point: For most standard product shoots on a tripod, I start with my ISO at 100 and my aperture at f/11. From there, I just adjust the shutter speed until the exposure looks perfect. This combination is your ticket to maximum sharpness and detail.
Composing Shots That Actually Sell
Once you've got your technical settings dialed in, it's time for the fun part: composition. This is where you move from just taking pictures to creating visually compelling images. Instead of just plopping your product in the center of the frame, start thinking about how to guide the viewer's eye.
The Rule of Thirds is a classic for a reason—it works. Imagine your frame has a 3x3 grid laid over it. Placing your product along one of those lines or at an intersection point, instead of dead center, instantly makes the photo feel more balanced and dynamic.
And don't underestimate the power of great visuals. The global photography services market was valued at a massive $55.6 billion** in 2023 and is expected to hit **$81.83 billion by 2032. That explosion shows just how vital professional-quality images have become for any online business. If you're curious, you can dig into more photography industry statistics.
Getting a solid grasp on these camera and composition basics will truly elevate your work. They provide the technical foundation and the artistic direction you need to create images that don't just show what you sell—they help you sell it.
Polishing Your Images in Post-Production
The click of the shutter isn't the end of the story. It's really just the beginning. The raw photo is your foundation, but the magic truly happens in post-production. This is where you transform a good shot into a professional, sales-driving asset.
Think of editing less as a rescue mission for bad photos and more as the final, critical polish that brings consistency and a high-end feel to your entire product line. It's what makes your products look their absolute best.
For an even deeper look, our full guide on https://quickpixel.co/blog/how-to-edit-product-photos walks through every nuance.
A Simple Workflow for Professional Results
You don't need to be a Photoshop wizard to get fantastic results. The key is to build a simple, repeatable process that you can apply to every image. This consistency is what builds a cohesive, trustworthy brand aesthetic for your customers.
Here’s a straightforward editing sequence that works every time:
- Crop and Straighten First: Before you do anything else, frame your product perfectly. A slightly crooked photo instantly cheapens the look. Straighten those lines and crop in to remove any distracting empty space. It’s a small step that makes a huge difference.
- Adjust Exposure and Contrast: Now, let's get the brightness right. The goal is to make the product stand out clearly without blowing out the highlights or crushing the shadows into a black mess. A little bump in contrast can add that perfect pop and dimension.
- Fine-Tune Colors: This is all about accuracy. Your product colors have to match what the customer will receive. Use the white balance tool to make sure your whites are truly white (not tinted yellow or blue). A slight tweak to saturation can make the colors feel rich and true-to-life.
- Apply Final Sharpening: This should always be your last move. A touch of sharpening adds that final bit of crispness, making the details stand out and giving the photo a professional, high-quality finish.
Consistency Is the Ultimate Goal
The real mark of professional product photography is consistency. When a shopper browses your site, every image should feel like it belongs to the same family. This is where batch editing becomes a game-changer.
Nearly all modern editing software, from Adobe Lightroom to free mobile apps, lets you save your settings as a preset.
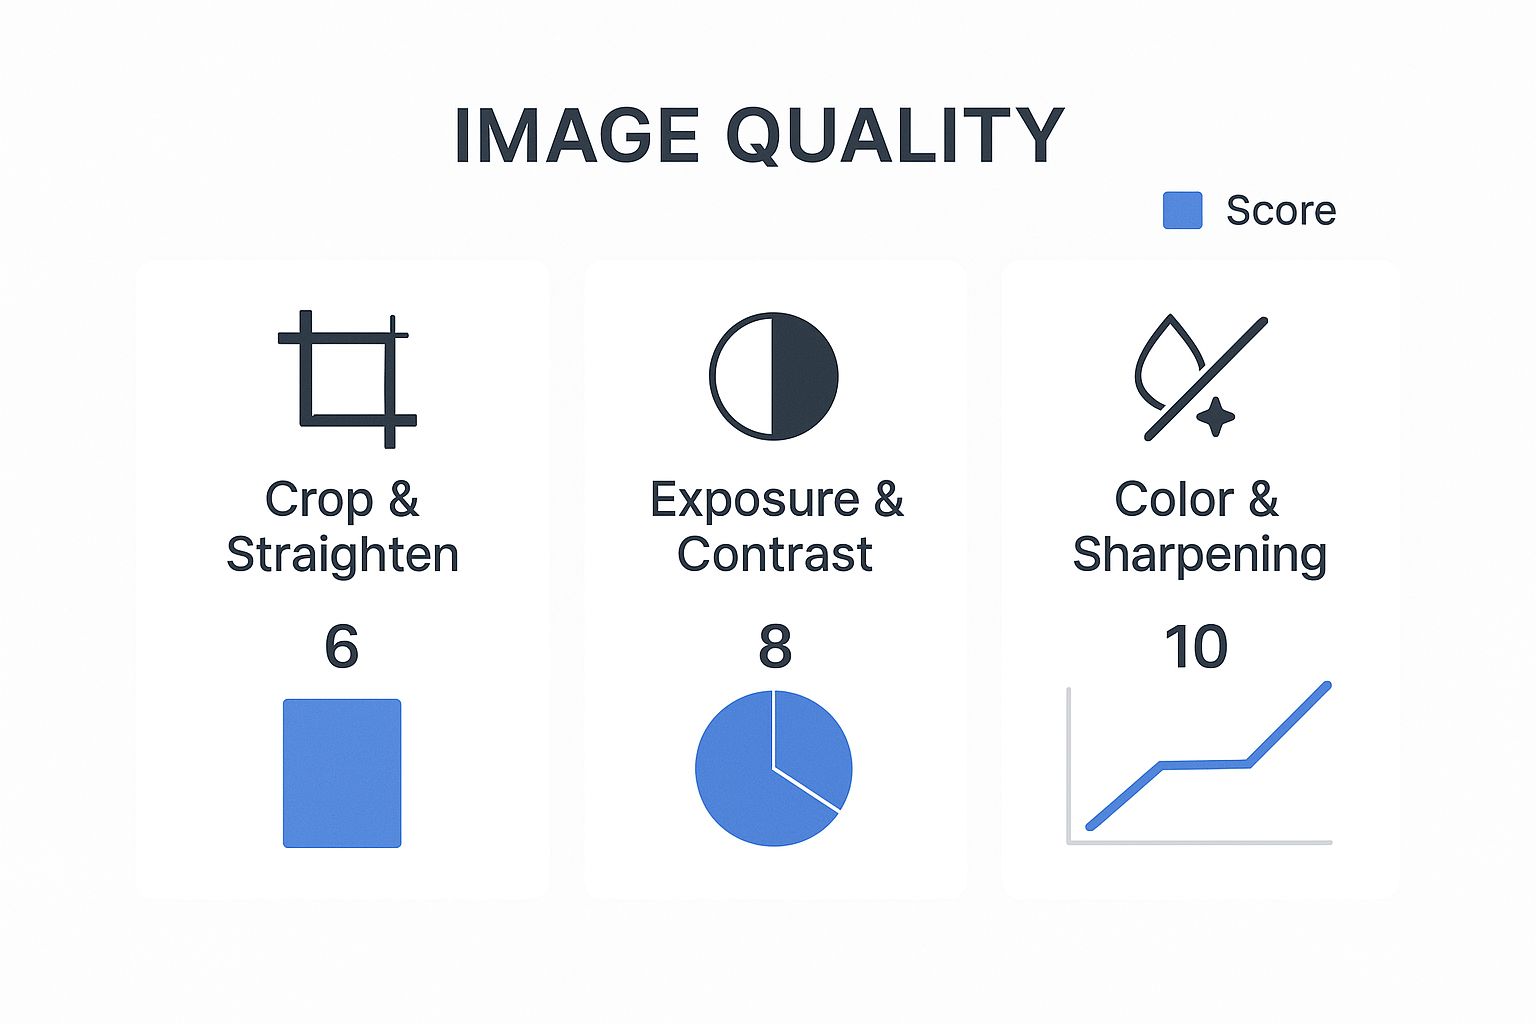
As this shows, each step layers on top of the last, with color correction and sharpening being the final touches that really elevate the image from good to great.
Pro Tip: Edit your first photo until it’s perfect, then save those exact settings as a custom preset. You can then apply it to an entire photoshoot's worth of images in a single click. It's the secret to maintaining a uniform look while saving yourself a massive amount of time.
Finding the right tool is a big part of building an efficient workflow. Here's a quick comparison of some of the most popular options out there to help you decide.
Editing Software Comparison for Product Photos
| Software | Best For | Key Features | Price Point |
|---|---|---|---|
| Adobe Lightroom | All-around professional editing & organization | Non-destructive editing, powerful batch processing, cloud sync, presets | Subscription-based ($9.99/mo) |
| Adobe Photoshop | Advanced retouching & complex edits | Layers, masking, advanced cloning, background removal, compositing | Subscription-based ($22.99/mo) |
| Canva | Beginners & quick social media edits | User-friendly templates, text overlays, simple filters, background remover | Free & Pro versions ($14.99/mo) |
| GIMP | Free, open-source alternative to Photoshop | Layers, masks, customizable interface, extensive plugin support | Free |
Ultimately, choosing a tool comes down to your budget and how deep you need to go with your edits. For most e-commerce sellers, Lightroom hits the sweet spot between power and ease of use.
A disciplined approach to post-production is what truly separates the amateurs from the pros. It ensures every single image you publish is clean, crisp, and consistent. And if you're looking to explore the next frontier, you might want to delve into AI product photography techniques that are changing how brands create visuals.
Building a Strategic Product Shot List

Knowing your way around lighting and composition will get you a great photo. But to achieve true professionalism, you need to tell a complete visual story with your images. That's where you shift from just being a technician to being a strategist. A well-thought-out shot list is your roadmap, ensuring you capture every single image a potential customer needs to see before they feel confident enough to hit "buy."
Instead of just taking a few random pictures, put yourself in the customer's shoes. What would you want to know? You’d want to see the front, back, and sides. You’d need to get a sense of its scale and see the texture up close. This is the core idea behind a great shot list—it anticipates and answers a customer’s questions before they even have to ask.
The Essential Shots Every Product Needs
A solid product page gives shoppers a full, 360-degree understanding of your item. Your job is to leave no stone unturned, building a compelling visual argument for why your product is the one they should choose.
Here are the non-negotiable image types that should be on every shot list:
- The Hero Shot: This is your money shot—the main product image, almost always on a clean white background. It needs to be sharp, perfectly lit, and show the entire product without any distractions. This is usually the first impression a shopper gets.
- Detailed Close-Ups: Time to get up close and personal. Use a macro lens or just move in tighter to showcase unique features, textures, or quality craftsmanship. For a leather wallet, you might focus on the stitching; for a piece of jewelry, it's all about the facets of the gem.
- In-Context or Lifestyle Shots: Show the product being used in a real-world setting. A lifestyle photo does the heavy lifting of helping customers imagine the item in their own lives. It answers questions about size and scale instantly and forges an emotional connection. This is where your brand’s story really comes to life.
- Group and Packaging Shots: Does your product come as part of a bundle or in beautiful packaging? Show it off! This is crucial for gift items, as it sets expectations for the unboxing experience.
When you plan these shots ahead of time, you stop being a reactive photographer and become a proactive brand storyteller. This organized method makes sure every angle is covered, which goes a long way in reducing buyer hesitation and building trust.
Tailoring Your Shots for Different Platforms
Your photography game plan can't be one-size-fits-all. The sterile, clean look that Amazon requires for a main listing image is worlds away from the aspirational, story-rich content that kills it on Instagram.
Always consider where your images are going to live. Amazon demands that pure white background for the primary photo, but platforms like Instagram and Pinterest reward you for rich, contextual lifestyle shots that draw people in. A proper shot list accounts for this, giving you assets for every channel so your brand looks consistent but still feels native to each platform.
This attention to detail is what separates the pros from the amateurs, and it directly impacts the bottom line. In fact, the 2025 State of the Photography Industry report highlights that photographers who diversify their services and offer personalized client experiences are seeing the biggest revenue growth. It’s solid proof that a client-focused, strategic approach really pays off.
Common Questions I Hear About Product Photography
Even with a solid guide, you're bound to run into some questions when you're just starting out. Trust me, I've been there. Getting straight answers to these common hurdles can save you a ton of headaches, so let's walk through some of the big ones.
Do I Really Need a Fancy DSLR Camera?
Honestly, no. Modern smartphone cameras are absolute powerhouses. They can capture incredible, professional-looking images that are more than good enough for your website or social media feeds.
The secret isn't the camera—it's everything else. Your lighting, a sturdy tripod, and a good eye for composition will make a far bigger difference than shelling out for expensive gear. Nail the fundamentals first. Your phone is plenty capable of getting you amazing results.
What’s the #1 Mistake Beginners Make?
Without a doubt, it's bad lighting. I see it all the time. Beginners tend to use harsh, direct light, like the on-camera flash or bright, midday sun. This creates ugly shadows, washes out colors, and hides the very details you're trying to show off. It immediately screams "amateur."
Professional photos almost always rely on soft, diffused light. You can get this for free by setting up near a large window on an overcast day. Even a thin white bedsheet hung over a window can work wonders to soften harsh sunlight. The goal is to wrap your product in gentle light, not blast it head-on.
How Many Photos Should I Take Per Product?
There's no single magic number, but a solid goal is to provide enough photos to answer any question a customer might have just by looking. I always recommend aiming for 5-8 photos per product to tell the whole story.
A good shot list usually looks something like this:
- The main "hero shot" on a clean, simple background.
- A few alternate angles showing the front, back, and sides.
- Some detailed close-ups to highlight texture, materials, or special features.
- An "in-context" photo showing the product in use. This is crucial for helping customers understand its real-world size and scale.
Giving shoppers this complete visual picture builds trust and confidence. When they can see every detail, they're much more likely to click "buy" instead of clicking away.
Ready to upgrade your product photos without the time and expense of a full photoshoot? QuickPixel uses AI to turn your simple pictures into studio-quality images that sell. Get polished, professional photos today by visiting the QuickPixel website.
Try QuickPixel Today
Get started with our AI-powered image generation tools