How to Fix Overexposed Photos for Good
It's a frustratingly common problem: you capture what you think is a fantastic shot, only to look at it later and find it's a washed-out, overly bright mess. The good news is, you can often fix overexposed photos by dialing back the Exposure and Highlights in your editing software.
For the best chance at recovery, shooting in RAW format is a game-changer. It captures far more image data than a standard JPEG, giving you the flexibility you need to bring back those lost details.
Your Guide to Recovering Overexposed Photos
So, how do you actually go about fixing those blown-out highlights? It really boils down to two main strategies: preventing the issue right in the camera, and rescuing the image later with some post-processing magic. Think of this as your complete game plan for tackling tricky lighting situations and saving photos you might have otherwise deleted.
This visual guide breaks down the two core approaches, starting with what you can do during the shoot and then moving into editing.

Following this flow from prevention to recovery reinforces a timeless photography principle: getting it right in-camera is always your best bet.
The Rise of Digital Correction
With an estimated 1.2 trillion digital photos taken in 2023, the need for solid editing skills has never been greater. A huge chunk of those—a staggering 85%—were taken on smartphones, which often have a tough time handling difficult lighting automatically.
Because of this, digital editing tools have become essential. Today, about 60% of photographers regularly use features like highlight recovery to pull back detail from overly bright parts of an image. You can dig deeper into these global photo trends on Statista.
Your Path to Perfect Exposure
To really master fixing overexposed photos, you’ll need to get comfortable with some effective editing tools. Success isn't just about dragging a slider to the left; it’s about knowing which adjustments to make to restore detail and create a balanced, natural-looking image.
The goal isn't just to make a photo darker; it's to selectively recover information in the highlights without making the rest of the image look flat or unnatural.
A quick comparison can help you decide where to focus your efforts.
Comparing Overexposure Correction Methods
This table offers a quick look at whether it's better to prevent overexposure in-camera or rely on post-processing fixes.
| Method | Best For | Key Advantage |
|---|---|---|
| In-Camera Prevention | Getting the best possible image quality from the start. | Preserves maximum image data, making post-processing easier and more effective. |
| Post-Processing Recovery | Saving shots that are already overexposed. | Offers powerful tools to rescue photos that would otherwise be unusable. |
While post-processing is a powerful safety net, preventing overexposure in the first place will always yield superior results.
To get there, you need to understand the two main approaches at your disposal:
- In-Camera Prevention: These are the proactive steps you take while shooting. Think mastering your camera's exposure compensation, using spot metering, or simply shooting in RAW to capture more data.
- Post-Processing Recovery: This is your reactive plan for after the photo is taken. It involves using software to carefully adjust sliders for highlights, whites, and overall exposure to bring back details that have been washed out.
Preventing Overexposure Before You Shoot
The best fix for an overexposed photo is to avoid taking one in the first place. While editing software is a fantastic safety net, getting the shot right in-camera gives you so much more to work with. It all starts with moving beyond your camera's 'Auto' mode and taking control.
When you nail the exposure from the get-go, you preserve the maximum amount of detail, which is the perfect foundation for a stunning final image.
This means getting comfortable with the tools your camera provides to judge brightness before you ever press the shutter. For instance, in controlled environments like product photography, mastering these settings is non-negotiable for consistent, professional results. If that's an area you're working on, our guide on how to take product photos has some great advice for getting it right every time.
Master Your Camera's Exposure Tools
Your camera has a few incredibly useful features built right in to give you live feedback on your exposure. Think of them as an expert assistant looking over your shoulder.
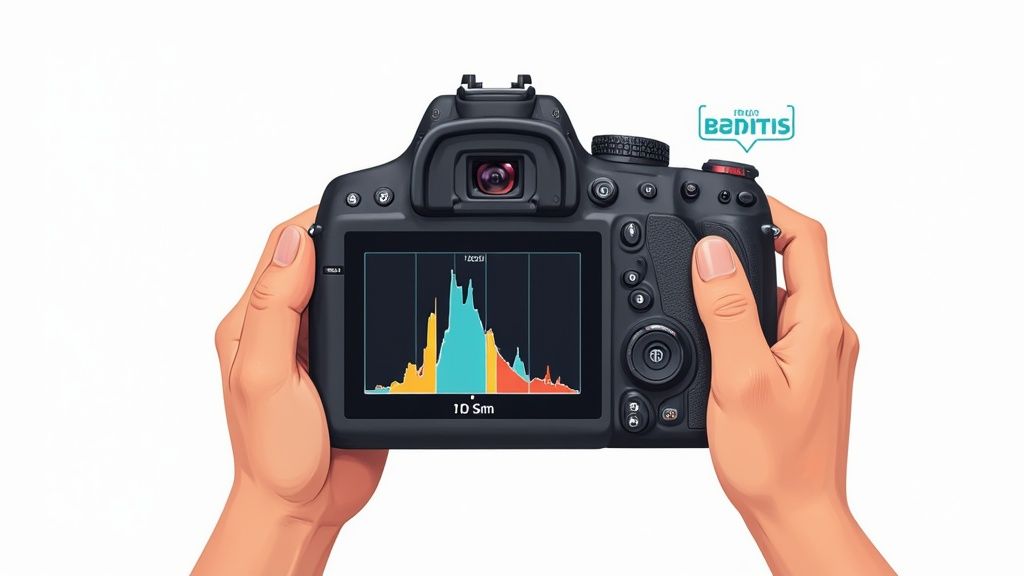
- Read the Histogram: Don't let this little graph intimidate you. The right side shows the highlights—the brightest parts of your photo. If you see a big spike slammed up against that right edge, that's a red flag. It means you're "clipping" your highlights and losing all the detail in those areas.
- Enable 'Blinkies': The official name is "highlight warnings," but many photographers just call them blinkies. This feature makes any completely blown-out part of your image flash on the LCD screen. See blinking? That's your cue to dial down the exposure and save that detail.
A core principle in digital photography is to "expose for the highlights." Why? Because it's almost always easier to pull detail out of dark shadows in post-production than it is to recover information from completely white, blown-out highlights.
Use Exposure Compensation and Metering
Once you see a potential overexposure problem, you need to tell your camera how to fix it. This is exactly what exposure compensation and different metering modes are for.
Exposure Compensation (EV) is your best friend here. It's usually a dial or button marked with a "+/-" symbol. By dialing it into the negative numbers (like -0.3, -0.7, or -1.0), you're telling the camera to deliberately darken the entire image. This is a lifesaver in tricky situations like bright, snowy landscapes or a day at the beach.
Spot Metering is another powerful tool in your arsenal. Instead of letting the camera evaluate the light across the whole frame, spot metering hones in on one tiny point. Imagine you're shooting a person against a very bright sky. You can aim that spot meter right on their face to make sure they are perfectly exposed, even if it means the sky naturally gets a bit darker.
Always Shoot in RAW Format
If you only take one piece of advice away from this, make it this one: shoot in RAW format.
Think of a RAW file as your digital negative. It holds all the raw, uncompressed data straight from your camera's sensor. A JPEG, by contrast, is a finished product. The camera has already made permanent decisions about brightness, color, and contrast, throwing away a massive amount of data in the process.
That extra data in a RAW file gives you way more flexibility to rescue highlight detail later on. While early digital cameras struggled with dynamic range, making clipped highlights a common headache, modern sensors and in-camera tools have put more real-time exposure control in our hands than ever before.
Fixing Overexposed Photos in Lightroom
So, you didn't quite nail the exposure in-camera. It happens to the best of us. The good news is that Adobe Lightroom is an incredibly powerful digital darkroom, and saving an overexposed photo is often entirely possible, especially if you had the foresight to shoot in RAW.

The trick is knowing which sliders to reach for first. A common rookie mistake is to just grab the main Exposure slider and yank it down. While simple, this darkens the entire image—even the parts that were perfectly fine—which usually leaves you with a flat, muddy-looking mess. A much more nuanced approach involves targeting the problem areas first.
Starting with Global Adjustments
Before you start painting on masks or making tiny tweaks, your first move should be in the Basic panel. This is where you'll make "global" adjustments, which means they affect the whole photo. Think of this as laying the groundwork for a successful recovery.
Your two most important tools right now are the Highlights and Whites sliders.
- Highlights Slider: This is your best friend for taming a blown-out sky or bright hotspots on a person's face. Pulling this slider to the left will specifically dial back the brightest parts of your image, often revealing incredible detail without touching your midtones.
- Whites Slider: This slider controls the absolute brightest point in the photo. After you've dropped the highlights, you might notice the image still has some clipped areas that lack texture (think of the delicate lace on a wedding dress). A gentle pull to the left on the Whites slider can bring back that subtle detail.
It's easy to get these two confused. Just remember: 'Highlights' rescues detail in the bright-but-not-quite-pure-white areas. 'Whites' sets the ceiling for the absolute brightest pixels in the frame. Using them together gives you fantastic control.
Mastering Local Adjustments for Precision
Once you've made those broad-stroke global edits, it's time to get specific. Often, you'll find that while your subject looks great, the sky behind them is still a bit too bright. This is where Lightroom’s local adjustment tools are a game-changer, letting you fix one part of an image without messing up another.
This level of precision is what separates a quick fix from a professional-looking edit. The same logic applies whether you're working on a sprawling landscape or a clean product shot. If you're running an e-commerce store, knowing how to edit product photos with these targeted tools can make a world of difference.
Using the Adjustment Brush
The Adjustment Brush is your tool for freehand painting. You can literally paint an adjustment onto a specific area. To bring back a blown-out sky, just select the brush, dial down its Highlights or Exposure setting, and paint over the sky. It's a fantastic way to darken one area while leaving everything else perfectly untouched.
Applying a Graduated Filter
For a problem like a bright sky that meets a darker horizon, the Graduated Filter (now found under the Masking tool) is pure magic. You just click and drag the filter from the top of the image downwards. The adjustment is applied at full strength where you start and fades out smoothly, creating a natural-looking transition. It's usually much quicker and cleaner than using the brush for big, even areas like skies.
By combining these global and local adjustments, you can build a workflow that recovers detail methodically and saves photos you might have thought were headed for the trash bin.
Advanced Overexposure Repairs in Photoshop
Sometimes you’ll run into a photo so bright that even Lightroom’s best efforts can’t pull it back from the edge. When the sliders just aren't cutting it, it’s time to bring in the heavy machinery: Adobe Photoshop. For those really tough, severely overexposed images, Photoshop gives you the surgical tools needed for a deep, non-destructive recovery.
This is where we go beyond simple global adjustments and start working with layers to save photos that look like a lost cause.
Camera Raw as a Smart Filter
One of my favorite workflows starts by opening the image as a Smart Object in Photoshop. Instead of making permanent, baked-in changes, you can apply the Camera Raw Filter. Suddenly, you have all the familiar, powerful sliders from Lightroom—like Highlights, Whites, and Exposure—but they’re running as a flexible, editable filter right on your layer.
The real advantage here is the non-destructive workflow. You can go back in and tweak those settings anytime just by double-clicking the filter, all without degrading your original image. It’s the perfect marriage of Lightroom's intuitive controls and Photoshop's layer-based power.
Mastering Curves with Layer Masks
When you need absolute precision, nothing beats a Curves adjustment layer. This tool gives you complete control over every single tone in your photo. To fix a blown-out area, you can just grab the upper part of the curve (the highlights) and pull it down gently.
But the real magic kicks in when you combine Curves with a layer mask.
With a layer mask, you can apply your darkening Curve adjustment only to the overexposed parts. Simply invert the mask to black, grab a soft white brush, and paint the effect back in precisely where you need it—like on a bright sky or a shiny reflection.
This technique is a lifesaver for complex shots where a global fix would just crush the details in the properly exposed areas. It’s also a foundational skill for more complex edits, like compositing. Our guide on how to change the background of a photo dives deeper into how versatile masking can be.
Advanced Blending Techniques
Every now and then, you’ll need to pull out all the stops to rescue an image. When simply darkening the highlights isn’t bringing back enough detail, a couple of advanced blending techniques can make a huge difference. They’re a bit more technical, but the results are often worth it.
- Multiply Blend Mode: This is a quick and powerful trick. Just duplicate your image layer and set the new layer’s blend mode to Multiply. The image will get significantly darker. It's usually too intense at full strength, so dial it back by lowering the layer’s opacity until it looks natural. You can also use a layer mask here to apply the effect selectively.
- Apply Image Command: This is a true pro-level move. The
Apply Imagecommand lets you use the information from one color channel to influence another layer. For instance, in a blown-out sky, the blue channel often retains more detail than the others. By blending that less-exposed channel data back into the image, you can often reconstruct details that seemed completely lost.
Lightroom vs Photoshop for Exposure Correction
While both tools are from Adobe and work seamlessly together, they excel at different things when it comes to fixing overexposure. Lightroom is fantastic for quick, efficient adjustments on entire batches of photos, especially RAW files. Photoshop is the tool you turn to when you need to perform detailed, localized surgery on a single image.
Here's a quick breakdown:
| Feature/Tool | Adobe Lightroom | Adobe Photoshop |
|---|---|---|
| Primary Workflow | Non-destructive RAW editing, catalog management. Best for 90% of exposure fixes. | Layer-based, pixel-level editing. Best for complex, targeted repairs. |
| Key Sliders | Exposure, Highlights, Whites, Shadows, Blacks. | Identical sliders available via the Camera Raw filter. |
| Advanced Tools | Radial, Linear, and Brush masks for local adjustments. | Curves, Levels, and layer masks for ultimate precision. |
| Specialty Techniques | HDR and Panorama merging. | Blend modes (Multiply, etc.), Apply Image, channel mixing for data recovery. |
| Best For | Quickly fixing moderately overexposed images and maintaining a consistent look across a set. | Saving severely blown-out photos that require isolating specific areas or reconstructing lost detail. |
Ultimately, knowing which tool to grab for the job is key. Start in Lightroom, and if you hit a wall, don't hesitate to take that image into Photoshop for the finishing touches.
The demand for this kind of expert-level editing is huge. The global photography services market was valued at an incredible $55.6 billion** in 2023, and a massive part of that is driven by high-quality post-processing. To put it in perspective, photo and video apps generated **$10.49 billion in 2022, with a staggering 70% of users primarily using them to adjust brightness and contrast—the very skills needed to fix overexposure.
Common Mistakes to Avoid When Editing
Figuring out how to fix overexposed photos is a huge step, but learning what not to do is just as important. It’s so easy to push an edit too far, trading one problem for another and ending up with something that just looks fake or heavily processed.
If you can sidestep a few common pitfalls, your edits will have a much lighter, more professional touch.
Don't Just Crank Down the Exposure Slider
The biggest mistake I see photographers make is immediately reaching for the Exposure slider. Your photo is too bright, so you yank that slider to the left. Problem solved, right? Not quite.
That move darkens the entire image—your highlights, midtones, and shadows all get dragged down together. The result is often a dull, muddy photo that’s completely lost its pop. A much better approach is to start with the Highlights and Whites sliders. These let you surgically target just the bright spots without wrecking the rest of your image.
Crushing Highlights and Creating Gray Patches
Another classic mistake is getting too aggressive with highlight recovery. When you slam the Highlights slider all the way down to -100, you’re not just recovering detail—you’re often crushing the life out of those bright areas.
Instead of bringing back texture in the clouds or the sheen on a person’s skin, you can create flat, ugly gray patches. The goal is recovery, not complete obliteration of brightness.
Here's a little pro-level advice: It's almost always better to recover 80% of the highlight detail and leave a little bit of pure white than it is to recover 100% and get a flat, lifeless image. A hint of true brightness actually makes a photo feel more realistic and dynamic.
Ignoring Unnatural Color Shifts
When you drastically darken an overexposed area, you have to watch out for weird color shifts. This happens all the time with skies. You pull down a blown-out white sky, and instead of a natural blue, you get a strange, sickly cyan or even magenta.
Warm, sunny highlights can be just as tricky, turning a gross yellow or green when you pull them back too hard.
Here’s what to keep an eye on:
- Skies turning odd colors: A completely white sky often doesn't have enough blue color data left to bring back.
- Skin tones becoming gray or green: Overdoing highlight recovery on a person’s face can strip away all the natural warmth.
- Sunsets looking fake: That beautiful orange and red glow can become muted or shift to bizarre hues.
Always zoom in and check your colors as you make big adjustments. If you spot these unnatural shifts, ease back on the sliders. Sometimes you need to jump over to your HSL or Color panels to specifically target those problem colors and bring them back to reality. Mastering these little details is what separates a quick fix from a professional-quality recovery.
Got Questions About Overexposure?
It's one thing to learn the techniques, but it's another to apply them when you're staring at a tricky photo. Let's tackle some of the most common questions that pop up, so you can make smarter decisions on the fly—both behind the camera and at your editing desk.
Getting these fundamentals down will turn frustrating edits into confident fixes.
Can a Totally Blown-Out, White Highlight Be Saved?
Honestly, probably not. When an area of your photo is pure, solid white, it usually means the camera's sensor was completely overloaded with light. We call these clipped highlights, and they’re essentially digital dead zones with no pixel information left to recover.
Your best fighting chance, though, is shooting in RAW. Even if a spot looks totally white on your camera's LCD screen, the RAW file might be hanging onto a thread of data. With some careful work on the Highlights and Whites sliders, you might just be able to pull something back. JPEGs, on the other hand, have already thrown that extra information away, making a rescue mission pretty much impossible.
Is It Better to Underexpose or Overexpose?
If you have to choose, it’s almost always better to slightly underexpose a digital photo. Modern camera sensors are fantastic at holding onto detail in the shadows. You can typically lift the shadows to reveal all that hidden information without a huge hit to image quality.
Blown-out highlights are a point of no return. Once that image data is gone, it’s gone for good. Shadows, however, are far more forgiving and offer a much wider safety net for recovery.
This is exactly why so many pros "expose for the highlights." They deliberately set their exposure to protect the brightest parts of the scene, even if it makes everything else look a little dark. They know they can bring the rest back later.
How Much Does RAW vs. JPEG Really Matter for Overexposure?
It matters—a lot. Shooting in RAW is the single most powerful advantage you have for fixing an overexposed shot. Think of a RAW file as your "digital negative." It’s an uncompressed package of all the pure, untouched data your camera sensor captured. This gives you massive flexibility when you start editing.
A JPEG, however, is a finished product. Your camera has already made permanent decisions about brightness, contrast, and color, compressing the file and discarding a ton of original data in the process. This leaves you with very little wiggle room to claw back those lost highlight details.
Ready to stop worrying about overexposure and get perfect product shots every time? Let QuickPixel handle the heavy lifting. Upload your existing photos, and our AI-powered service will deliver professional, studio-quality images with perfect lighting and clean backgrounds.
Try QuickPixel Today
Get started with our AI-powered image generation tools