How to Change the Background of the Photo: A Practical Guide
Knowing how to change the background of a photo is one of those fundamental skills that can take your images from looking amateur to polished and professional. The fastest way to get it done? Use an AI-powered tool to automatically lift your subject from its original setting and drop in a clean color or a whole new scene. It usually only takes a few clicks.
Why Changing a Photo Background Matters
Ever scrolled through a website and noticed how some product photos just pop while others seem to get lost? The secret is almost always in the background. A thoughtful background swap can be the single thing that turns a distracting snapshot into a high-converting product image. What used to be a skill only pro designers had is now something anyone can master.
From Cluttered to Clean
Think about a small e-commerce brand just starting out, maybe taking photos in a spare room. The product itself could be amazing, but a busy background full of clutter screams unprofessional.
By swapping out that background for a crisp, white one, that same product suddenly looks like it belongs on a major retail site. It’s a small tweak that builds instant trust and, most importantly, keeps the buyer’s focus exactly where you want it: on what you’re selling. For a deeper look at this, you can learn more about what is product photography and why visual consistency is so crucial.
Building a Strong Personal Brand
This technique isn't just for e-commerce, either. A freelancer can take a simple headshot from their living room and turn it into a serious branding asset.
A professional headshot with a clean, branded background conveys authority and attention to detail. It’s a subtle yet powerful signal to potential clients that you take your work seriously.
Instead of that plain wall, you could place yourself in a modern office or use a background that incorporates your brand’s colors. This creates a cohesive, memorable look across your LinkedIn profile, personal website, and social media, helping you stand out in a pretty crowded market.
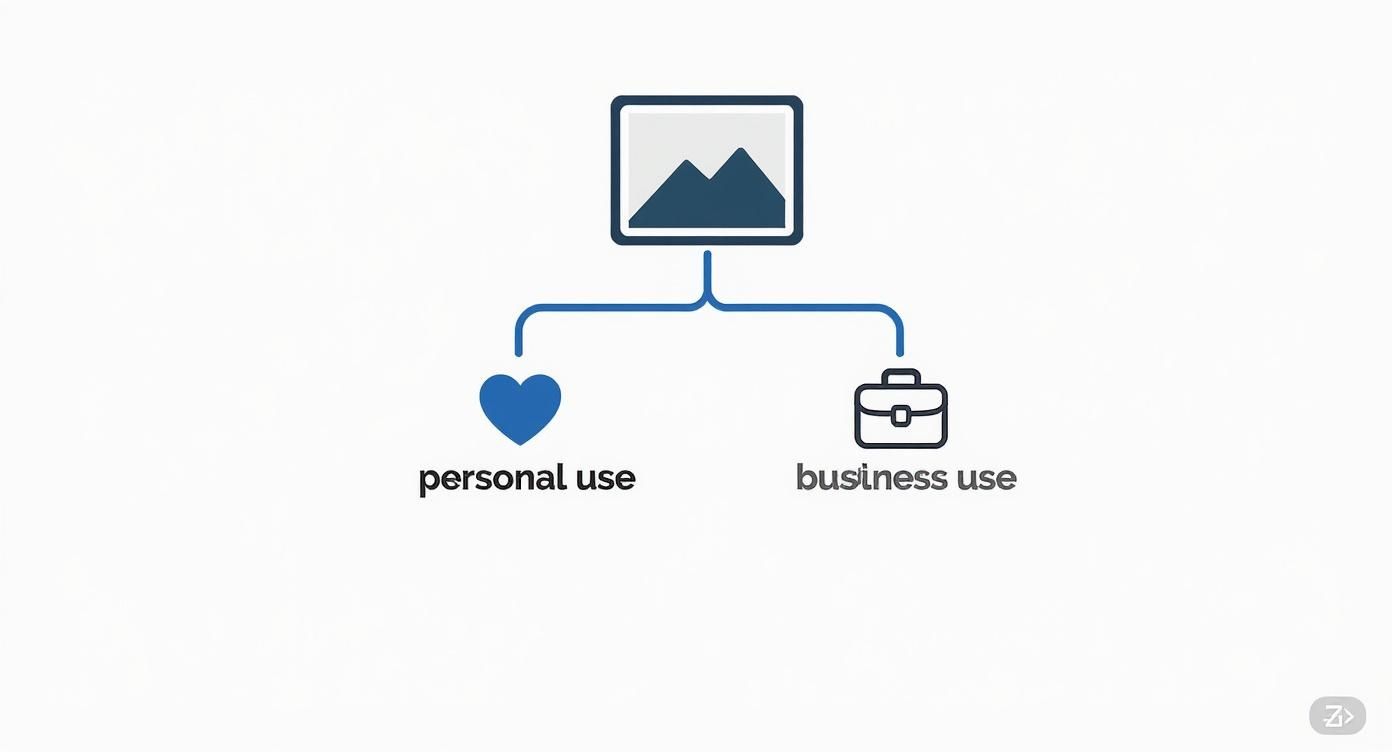
Choosing Your Tool: AI vs. Manual Editing
Before you can swap out a background, you have a crucial decision to make: will you use a smart, automated AI tool or go the traditional route with manual editing software? There’s no single right answer. The best choice really depends on what you're working on, how complex the image is, and frankly, how much time you've got on your hands.
For everyday tasks—like prepping product shots for an online store or just cleaning up a profile picture—AI tools are an absolute lifesaver. They are designed for one thing: speed. You just upload your photo, and the algorithm gets to work, often giving you a solid result in just a few seconds.
On the flip side, sometimes you need total control. When you're dealing with tricky details like wisps of hair, see-through fabrics, or intricate shadows, nothing beats the precision of manual software like Adobe Photoshop. It definitely takes more practice, but it puts you in the driver's seat for every last pixel.
Making the Right Call for Your Project
The massive growth in background removal tools shows just how popular these solutions have become. The market was valued at an impressive USD 1.2 billion in 2023 and is expected to climb to USD 4.4 billion by 2030, mostly because AI has made this once-tedious task so accessible.
This handy guide can help you figure out which path to take.
As you can see, the choice often boils down to a trade-off between speed and precision. Is this a quick job for personal use, or a high-stakes commercial project where every detail matters? If you're curious about the current landscape, checking out the best AI for photo editing can give you a better sense of what these tools can do.
To break it down even further, let's look at a side-by-side comparison. This table highlights the core differences between the two approaches, helping you match the right tool to your specific task.
| Feature | AI-Powered Tools | Manual Software (e.g., Photoshop) |
|---|---|---|
| Speed | Extremely fast—results in seconds. | Much slower; can take minutes to hours. |
| Ease of Use | Very beginner-friendly; often one-click. | Steep learning curve; requires skill. |
| Precision | Good for simple subjects, struggles with fine details. | Pixel-perfect control over every detail. |
| Cost | Often subscription-based or pay-per-use. | Typically a higher upfront or subscription cost. |
| Best For | E-commerce, social media, quick mockups. | Professional photography, complex composites. |
Ultimately, picking the right tool is about efficiency and results. There's no point in spending an hour meticulously tracing paths in Photoshop if an AI tool can give you a perfectly clean cutout in five seconds flat. Choose smart and get back to creating.
Get Instant Results With an AI Background Remover
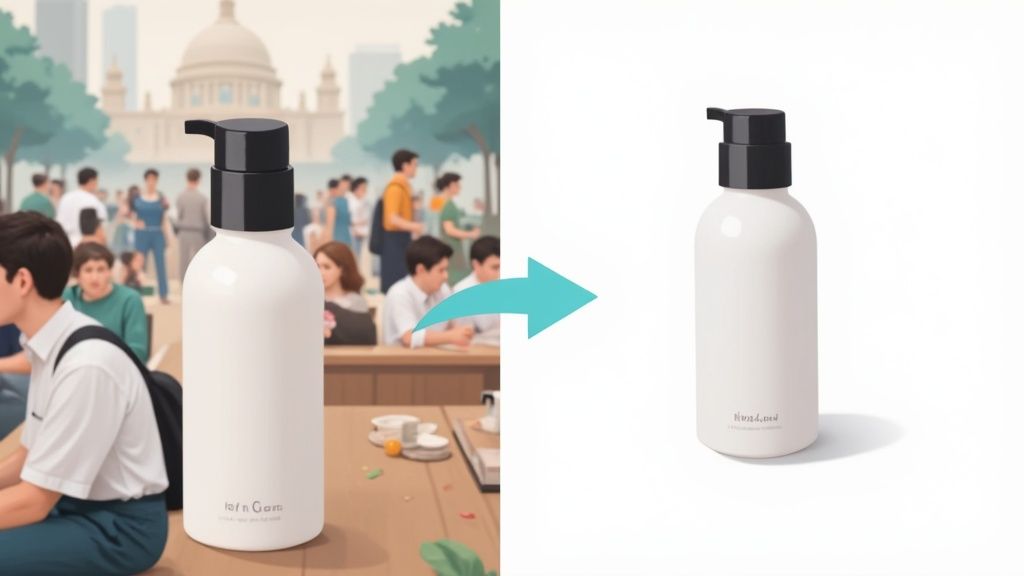
Forget the hours spent tediously tracing outlines. Modern AI background removers have made this once-painful task something you can knock out in seconds. Let's walk through how you can get a professional result without the headache, using today's AI tools.
The process is incredibly simple. It all starts with uploading your image—it could be a quick product shot from your phone or a professional portrait. The moment you upload it, the AI kicks in, scanning the photo to tell the difference between your main subject and everything else.
In just a few seconds, you'll see a clean cutout of your subject. From there, what happens next is completely up to you.
Picking Your New Background
With your subject isolated, the creative part begins. You can now pop in a new background that fits exactly what you need.
Some popular choices I see all the time include:
- A solid color: This is the gold standard for e-commerce. A crisp white or light gray background gives product listings a clean, uniform look that helps them stand out.
- A transparent layer: Essential for creating logos, web graphics, or any image you need to place on top of another design without a clunky box around it.
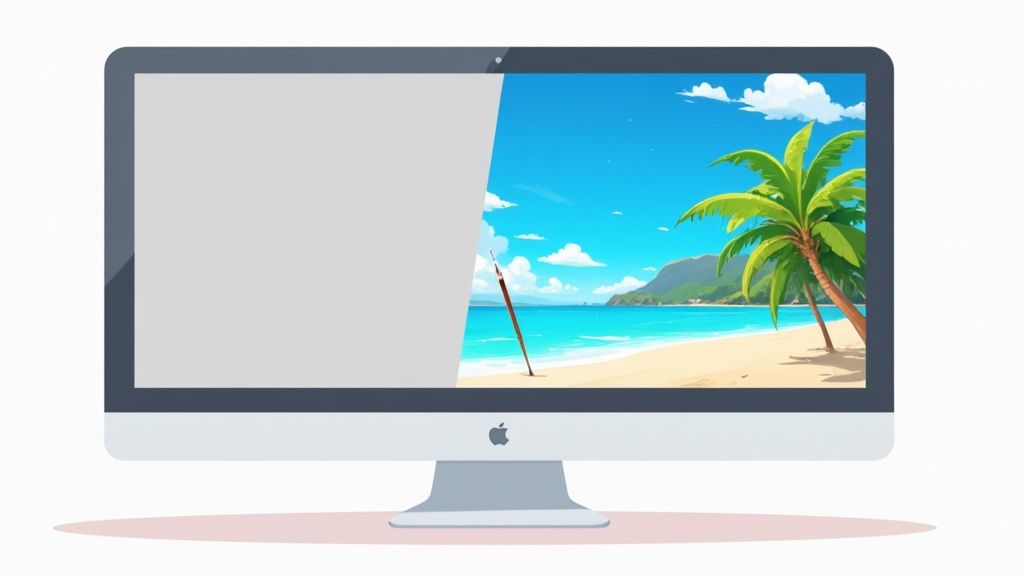
- A brand new scene: This is where you can get really creative. Swap a cluttered living room for a sleek, modern office space or place a person on a beach they've never been to.
If you're looking for more than just background removal, exploring some advanced Photo AI tools is a great next step. Many of these platforms bundle this feature with a whole suite of other powerful editing options.
My Pro Tip: For the cleanest cut, start with a photo where your subject has a clear, defined edge against the background. High contrast makes it much easier for the AI to do its job perfectly on the first try.
Finalizing with Minor Touch-Ups
Even the smartest AI isn't perfect. Sometimes it might miss a stray hair or get confused by a fuzzy texture. That's why nearly every good tool includes some basic touch-up brushes.
You'll typically find an "erase" and "restore" tool. These let you go in and manually paint back a part of the background that was missed or remove a piece of the old background that's still hanging on. It's the final polish that ensures a flawless result.
The great thing is, you don't need a powerful computer or expensive software anymore. The rise of cloud-based tools means you can do this from any device. This shift has made professional-level editing accessible to everyone, which you can read more about in the latest background removal software market analysis. It’s all about getting great results without the steep learning curve.
Mastering Manual Edits for Ultimate Precision
AI tools can get you 95% of the way there, which is incredible. But when you need that last 5% for a high-stakes commercial shot or a complex creative composite, it's time to roll up your sleeves and take manual control. This is where software like Adobe Photoshop or the open-source hero, GIMP, really comes into its own.
Taking the wheel yourself gives you the pixel-perfect control that automated tools just can't replicate. It's less about speed and all about intention.
You're trading a one-click solution for a suite of precise digital instruments. The goal isn't just to remove a background, but to craft a flawless result that perfectly matches your vision.
The Power of Paths and Masks
At the core of any good manual cutout are two things: selection tools and layer masks. Think of them as your digital scalpel and your safety net.
For anything with hard, clean edges—a smartphone, a book, a modern chair—the Pen Tool is your absolute best friend. By meticulously plotting points to create a vector path, you get a perfectly smooth and crisp outline. It’s the undisputed champion for product photography where sharp, professional lines are non-negotiable. Yes, it takes patience, but the results speak for themselves.
For softer, more organic shapes, you'll need different tools. But whatever you use to make your selection, the next step is what separates the amateurs from the pros.
I see so many beginners make the mistake of just hitting the delete key on the background. Please don't do that! Always, always use a layer mask. It's a non-destructive approach that simply hides the background instead of erasing it. This means you can go back and tweak the edges anytime without damaging your original image.
Tackling Complex Selections Like Hair
Let's talk about the classic nightmare scenario for automated tools: a portrait with wispy, flyaway hair against a busy background. This is where a skilled hand can make all the difference.
Programs like Photoshop have dedicated features built for this exact problem. Here’s a workflow I use all the time for these tricky edits:
- Start with a rough selection: I'll grab the Quick Selection Tool to get a decent outline of the main subject. I’m not worrying about the fine hair details at this stage.
- Jump into "Select and Mask": This is where the real work begins. It’s a specialized workspace designed for refining selections.
- Grab the Refine Edge Brush: This tool is a lifesaver. You literally paint over the problem areas, like the edges of the hair, and the software intelligently separates the delicate strands from the background clutter.
- Output to a Layer Mask: Once I'm happy with how the edges look, I apply the refined selection as a new layer mask. The result is a clean, believable cutout.
Mastering this combination of tools is what truly gives you the power to change the background of a photo and create a composite that looks completely natural. It’s a skill that definitely takes practice, but it's what will elevate your editing to a professional level.
Pro Tips for Making Your Edits Look Believable
Getting a clean cutout is only half the battle. The real magic happens when you blend your subject so seamlessly into the new background that no one can tell it was edited. I've spent years honing these techniques, and it really comes down to mastering the little details.
Let's start with the most common mistake I see: mismatched lighting. It's a dead giveaway.
Before you do anything else, study your new background. Where is the light coming from? Is it a single, harsh source from the upper left? Or is it soft, diffused light from all around? Your subject has to live in that same light. If the highlights on your subject are on the right, but the sun in your new beach scene is on the left, it’s going to look jarring and fake. You'll need to adjust the shadows and highlights on your subject to match the new environment.
Fine-Tuning Colors and Edges
Next up is color. A person shot under warm, yellow-toned indoor lights will stick out like a sore thumb if you drop them into a cool, blueish, overcast day. This is where your color balance tools come in. Nudge the tones of your subject just a little—add a hint of blue for cooler scenes or a bit of yellow for warmer ones—until everything feels like it belongs together.
Pay close attention to the edges of your subject, too. Perfectly sharp, clinical edges scream "cutout." A simple trick is to add a tiny feather to the edge, maybe just 1-2 pixels. This ever-so-slightly softens the transition and helps your subject settle into the scene, avoiding that cheap, sticker-like look.
The ultimate goal is for no one to notice your work. A simple drop shadow, for example, can instantly ground your subject in its new space. It adds depth and creates a sense of place, making the whole composition far more realistic.
These professional techniques aren't just for desktop software anymore. The explosion of AI-powered mobile apps has completely changed the game, especially for younger creators. It turns out that over 70% of Gen Z and Millennials have already used AI photo editing tools, which points to a huge shift in how we create and share images.
If you're curious, you can learn more about the future of AI in photo editing and why mastering these pro tips will put you ahead of the curve.
Creative Ideas for Your New Photo Backgrounds
Alright, so you’ve mastered the mechanics of swapping out a photo's background. Now comes the fun part: deciding what to put there instead. Moving beyond a standard white backdrop, especially for e-commerce, opens up a massive playground for branding and visual storytelling.
You can instantly give your brand a more premium feel by dropping products into realistic lifestyle scenes. Think about it: a sleek new water bottle looks good on a plain background, but it looks aspirational resting on a yoga mat next to a sunlit window. Suddenly, you're not just selling a bottle; you're selling a healthy, mindful lifestyle.

This same logic works wonders for professional headshots. Instead of a generic office blur, why not use a background that says something about your industry or personal brand? A graphic designer might use a backdrop with clean lines and a pop of color, while a financial advisor might opt for something more traditional. If you're looking for inspiration, checking out some of the 10 best headshot backgrounds can give you some solid ideas.
Beyond Branding into Social Media
This new skill is also your secret weapon for creating social media graphics that actually stop the scroll. By placing people or products into totally unexpected settings, you can whip up images that are humorous, surreal, or just plain striking.
Here are a few ways I've seen this done effectively:
- Thematic Content: Drop a person into a festive holiday scene for a seasonal campaign or build a futuristic cityscape for a post about new tech.
- Visual Metaphors: Need to illustrate an abstract concept like "growth"? Place your subject on an upward-climbing mountain path. It’s a simple visual that immediately gets the point across.
- Personal Projects: This is your chance to get weird. Create epic fantasy portraits for fun or design unique digital art by blending different images and textures together.
The most effective background changes aren't just about aesthetics; they add context and emotion to an image, making it far more engaging and memorable for your audience.
For businesses, choosing the right background for product photography is absolutely critical for building a brand that looks and feels cohesive. You can find more on that here: https://quickpixel.co/blog/background-for-product-photography. This one change can seriously boost the perceived value of your products and build trust with customers.
Whether it’s for your personal brand, your online store, or just for the sheer joy of creating, changing the background gives you the power to become a true visual storyteller.
Your Photo Background Questions, Answered
As you dive into changing photo backgrounds, you'll probably run into a few common hurdles. I've seen these questions come up time and time again, so here are some straight-to-the-point answers to help you get professional results.
Can I Actually Change the Background on a Blurry or Low-Resolution Photo?
Technically, yes, but you probably won't like the outcome. AI and manual selection tools rely on having plenty of pixel data to work with. The clearer the image, the more information the software has to distinguish your subject from its surroundings.
When you use a low-resolution photo, the tool struggles to find a clean edge. This almost always results in a sloppy, jagged cutout that looks unprofessional. My advice? Always start with the highest-quality image you can get your hands on. It makes all the difference.
What's the Right File Format for a Transparent Background?
For images with a transparent background, PNG (Portable Network Graphics) is the undisputed champion.
JPEGs can't handle transparency; they'll automatically fill in any empty areas with a solid white or black background, which completely defeats the purpose. PNGs, on the other hand, were built to preserve that transparency, making them perfect for layering images, creating web graphics, or designing logos.
Pro Tip: After you’ve removed the background, always remember to use the "Save as PNG" or "Export as PNG" option in your software. This simple step is what keeps your background transparent.
Why Do the Edges of My Cutout Look So Jagged?
Ah, the dreaded jagged edge. This is a classic problem, especially when working with tricky subjects like flyaway hair, fuzzy sweaters, or pet fur. It usually happens when there isn't enough contrast between your subject and the original background, confusing the selection tool.
Don't worry, you can fix it. Here are a few things to try:
- Feather Your Selection: In your editing tool, try softening the edges of your selection by just 1 or 2 pixels. This creates a much smoother, more natural-looking transition.
- Lean on Refinement Tools: Most serious photo editors, like Adobe Photoshop, have dedicated tools for this. Look for features like the "Refine Edge" or "Select and Mask" brush to intelligently capture those fine details.
- Do a Little Manual Cleanup: Sometimes, the best solution is the simplest. Grab a soft-edged eraser or brush and gently clean up the problem areas by hand. A few quick touch-ups can make a massive difference.
Ready to skip the tedious parts and get straight to stunning, professional images? Let QuickPixel do the heavy lifting. Our AI service turns your product photos into studio-quality visuals in just a few clicks—perfect for any online store or marketing campaign. Get started with QuickPixel today.
Try QuickPixel Today
Get started with our AI-powered image generation tools