Professional Jewelry Photography: A Practical How-To Guide
Great jewelry photography is more than just taking a picture; it's about capturing the soul of a piece. It’s a specialized craft that combines precise technical skill with an artistic eye to showcase the fine details, the quality of the materials, and the pure beauty of the jewelry. To do it right, you need the right gear—think macro lenses, controlled lighting to tame those tricky reflections, and a solid post-production workflow. The end goal? To create images that not only build your brand's credibility but actively drive sales.
The Art and Science of Capturing Brilliance
Photographing jewelry is a unique beast. It’s a delicate dance between technical precision and creative flair. Unlike shooting a t-shirt or a coffee mug, you're dealing with tiny, highly reflective subjects packed with intricate details. One flat, poorly lit photo can completely fail to communicate the value of a piece. But a stunning shot? That can make a customer feel the elegance and appreciate its worth without ever touching it.
This blend of art and science is absolutely essential in today’s crowded market. The global photography services market was valued at a massive $55.6 billion in 2023** and is expected to climb to **$81.83 billion by 2032. This shows just how much demand there is for top-tier visual content, especially in specialized areas like jewelry photography.
Why High-Quality Images Matter
Exceptional photography doesn't just display a product; it creates a genuine connection with the person looking at it. For something as personal as jewelry, that connection is everything.
- It Builds Customer Trust: Professional, polished images are a signal of quality and legitimacy. They give buyers the confidence that they're investing in a valuable, well-made item.
- It Highlights the Details: A crisp, perfectly lit photo brings out the delicate craftsmanship in a ring's setting or the sharp, clean facets of a gemstone—the very details that justify the price tag.
- It Sparks an Emotional Connection: A great photo tells a story. It helps customers imagine themselves wearing that necklace on their wedding day or gifting those earrings for a special anniversary.
Ultimately, the goal of professional jewelry photography is to translate the tangible beauty and value of a piece into a single, compelling image. It’s about making someone fall in love with a ring, necklace, or bracelet just by looking at their screen.
Setting Expectations for This Guide
Think of this guide as your roadmap to creating images that truly resonate with customers. We're going to break down the entire process, from the essential gear you'll need to the lighting setups and styling tricks that will make every piece sparkle. You'll learn how to prep your jewelry so it's flawless and ready for its close-up.
For some foundational knowledge to get you started, you might find these Top Jewelry Photography Tips helpful as well. Let's get started on turning your product photos from simple snapshots into your most powerful sales tools.
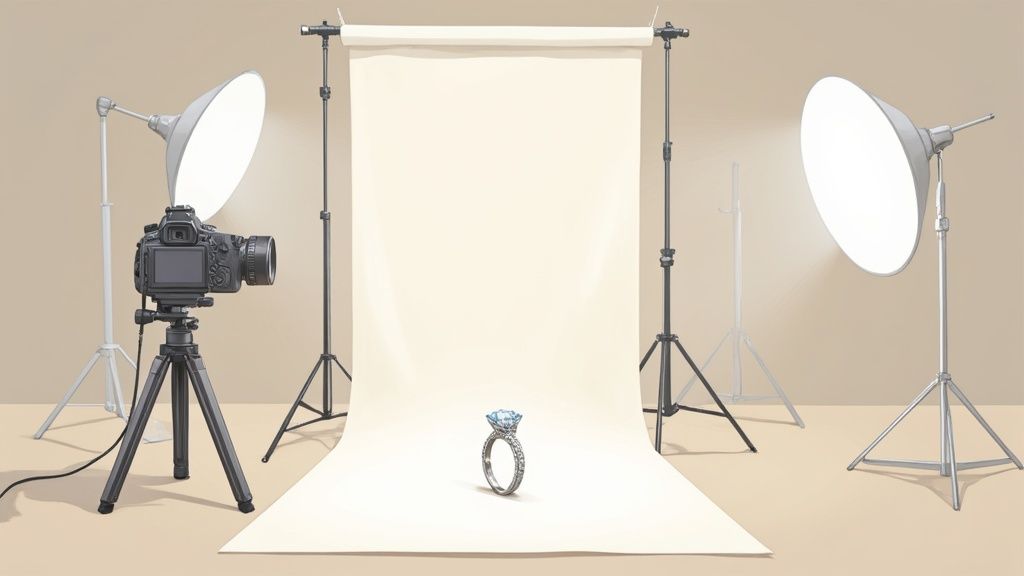
Setting Up Your At-Home Photography Studio
You absolutely don't need a sprawling commercial studio or a massive budget to create stunning jewelry photos. The truth is, a dedicated corner in your home can produce incredible, professional-grade results. It all comes down to controlling the environment with the right gear.
Getting this foundation right is everything. A proper setup gives you rock-solid stability, lets you nail the focus on those tiny details, and provides the freedom to play with lighting and angles without having to reset your entire shot. Investing in a few key pieces of equipment will pay you back tenfold in the quality of your images.
The Must-Have Equipment Checklist
When you're just starting, there are a few pieces of gear that are truly non-negotiable. Each one is a game-changer for tackling the specific challenges of shooting small, shiny objects like jewelry.
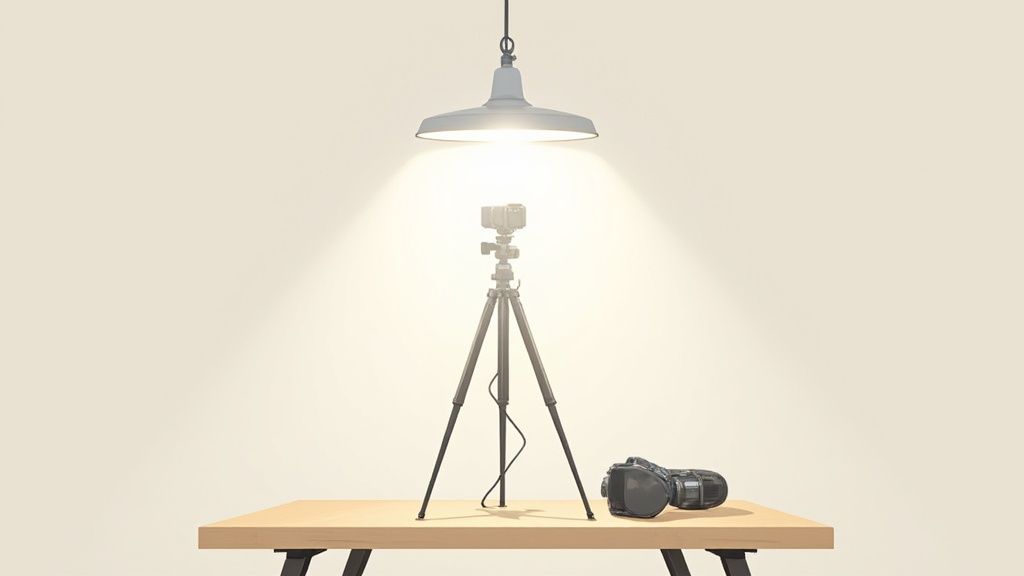
- A Sturdy Tripod: With macro photography, even the slightest camera movement gets magnified and can ruin an image. A good, solid tripod is your best friend for eliminating blur and keeping your shots perfectly consistent.
- A Macro Lens: To really show off the intricate details—the facets on a gemstone, the texture of the metal—you need to get close. A true 1:1 macro lens is the gold standard for this and lets you capture details the naked eye might miss.
- Remote Shutter or Timer: Believe it or not, just pressing the shutter button on your camera can introduce tiny vibrations that soften the image. A remote shutter release or even your camera's built-in timer lets you take the shot without ever touching the camera, ensuring it's as sharp as possible.
I always tell people to think of the tripod, macro lens, and remote shutter as the holy trinity for sharp jewelry photos. Without them, you're just making your job harder, fighting against the very blur and lack of detail that will turn customers away.
Crafting the Ideal Lighting and Background
Lighting is, without a doubt, the most critical piece of the puzzle. The goal here is to create soft, diffused light that wraps around the jewelry, illuminating it evenly without causing distracting glares or harsh, ugly shadows.
A lightbox or shooting tent is a fantastic all-in-one solution for this. These tents surround your product with a white, translucent material that softens any light source you point at it, giving you that beautiful, flattering glow. They're perfect for achieving the clean, bright look that dominates e-commerce.
For your background, keep it simple. A roll of white seamless paper is your best bet. It provides a clean, neutral surface that lets the jewelry be the star of the show. You can create a smooth "sweep" by letting the paper curve from a vertical surface down onto your table, which cleverly eliminates any distracting lines or corners behind your product.
If you're looking for more tips on pulling this all together without breaking the bank, check out our guide to a DIY product photography setup. By carefully choosing your gear and controlling your shooting space, you're building a reliable system for creating gorgeous photos every single time.
Mastering Your Camera and Lighting
Once your home studio is set, it's time to dive into the technical heart of jewelry photography: your camera settings and lighting. This is where the real magic happens, turning a beautiful object into an irresistible image. How you control your camera and shape the light will make or break your final shot.
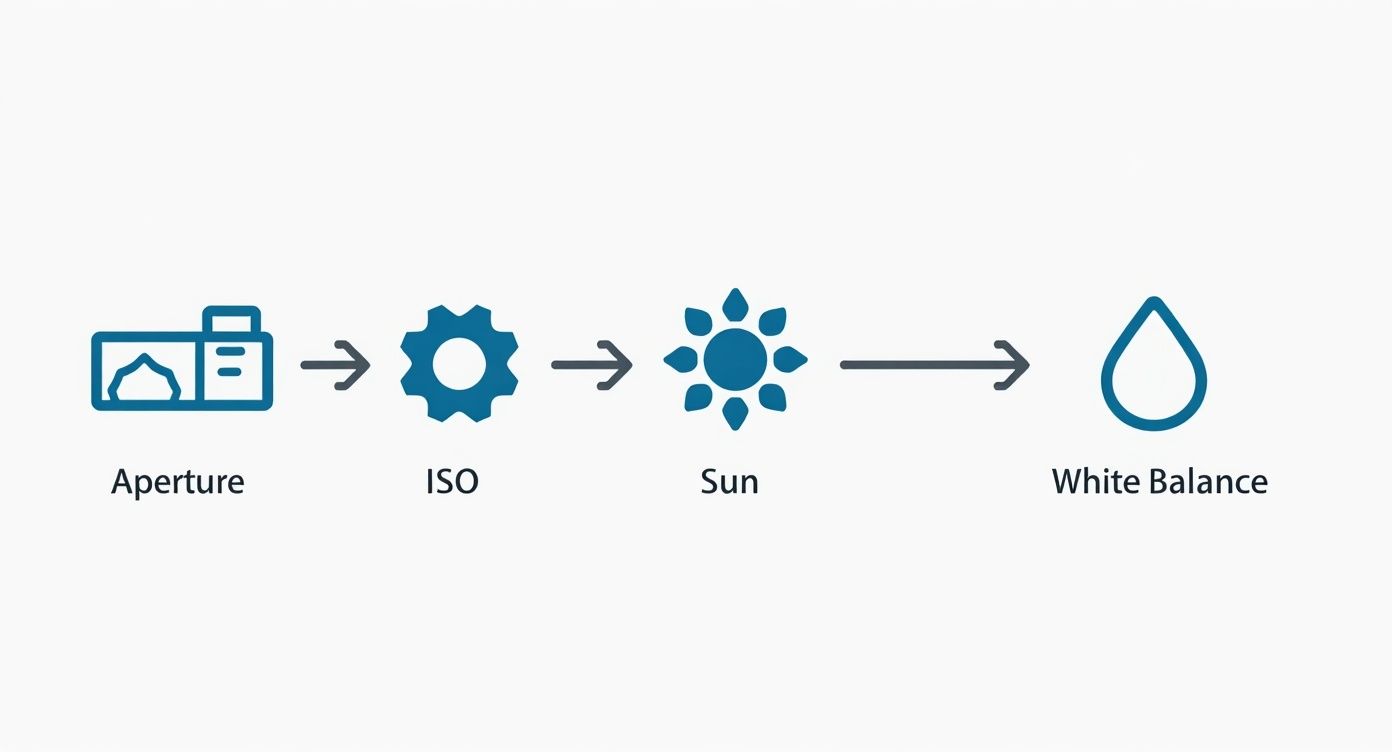
It all boils down to the relationship between aperture, ISO, and shutter speed—the classic exposure triangle. Getting these three to work in harmony is the key to capturing those tiny, brilliant details that make your jewelry special. This isn't just about making the picture bright enough; it's about controlling light with surgical precision.
Dialing in Your Camera Settings
For something as intricate as jewelry, your camera settings have to be on point. You’re not just taking a quick photo; you're carefully composing an image that shows off every single facet, curve, and texture.
Here’s my advice for getting started:
- Aperture (f-stop): This is your most critical setting. To keep an entire ring or necklace tack-sharp from front to back, you need a deep depth of field. I always start with a narrow aperture, somewhere between f/11 and f/16. This ensures maximum clarity across the whole piece.
- ISO: Keep your ISO as low as your camera will go. For most, that’s ISO 100. A low ISO is non-negotiable for preventing digital "noise"—that grainy texture that can make polished metal look cheap. Since your camera is on a tripod, there’s no need to bump up the ISO to compensate for shaky hands.
- Shutter Speed: Because you've set a narrow aperture and a low ISO, your shutter speed will need to be slower to let in enough light. Don’t worry about it! Your tripod is doing all the work, so let that shutter stay open for as long as it takes to get the perfect exposure.
The exposure triangle is a constant balancing act. For jewelry, the goal is always a low ISO for clean images and a narrow aperture for sharpness. Shutter speed becomes the flexible part of the equation that brings it all together.
To make it even easier, here’s a quick reference table I put together with the settings I use most often.
Recommended Camera Settings For Jewelry Photography
This quick reference guide covers the essential camera settings for achieving sharp, clean, and professional jewelry photos.
| Setting | Recommended Value | Reason |
|---|---|---|
| Shooting Mode | Manual (M) | Gives you full control over aperture, shutter speed, and ISO for precise results. |
| Aperture (f-stop) | f/11 to f/16 | Creates a deep depth of field, ensuring the entire piece is in sharp focus. |
| ISO | 100 (or lowest native) | Minimizes digital noise and grain, resulting in a clean, smooth image. |
| Shutter Speed | Variable (e.g., 1/15s to 1s+) | Adjust as needed to achieve the correct exposure after setting aperture and ISO. |
| White Balance | Custom (using a gray card) | Ensures accurate color representation, preventing gold from looking green or silver blue. |
| Focus Mode | Manual Focus (MF) | Allows you to pinpoint the exact area of focus, often the main gemstone or clasp. |
Think of this table as your starting point. You'll fine-tune things based on your specific lighting and the piece you're shooting, but these settings will get you 90% of the way there.
Manipulating Light for Perfect Results
Your lighting setup is what truly elevates a photo from looking like a quick snapshot to a professional studio shot. The goal here is to create soft, diffused light that wraps around the jewelry, eliminating harsh shadows and taming those tricky reflections.
A fantastic starting point is a single, large light source, like a softbox, placed to the side and slightly above your setup. This simple arrangement creates gentle highlights and soft shadows that give the piece dimension without being distracting. To complete the effect, place a white bounce card or a small reflector on the opposite side. This will fill in any deep shadows and give the metal a beautiful, even glow.
Here’s a pro tip that’s absolutely crucial: set a custom white balance. Your camera's auto white balance often gets confused by studio lights and shiny surfaces, which can throw your colors way off. You don’t want your 18k gold looking slightly green or a diamond taking on a blueish tint. Using a simple gray card to set a custom white balance guarantees that your colors are rendered perfectly—a must-have for earning your customers' trust.
If you’re looking to go even deeper and learn more advanced techniques, there are some great resources out there on how to photograph jewelry effectively. Nailing these camera and lighting fundamentals is the bedrock for creating stunning jewelry images every single time.
Styling and Composing Every Shot
Getting the technical side right gives you a clean, sharp photo. But that's only half the battle. What truly sells a piece of jewelry is the story you tell through styling and composition. This is where we move past the camera dials and into the art of making someone feel something when they look at your image.
Your styling strategy really depends on where the photo will live. If you're shooting for an e-commerce platform like Amazon or your own product page, the clean, minimalist shot on a pure white background is king. It’s the industry standard for a reason: it puts the product front and center, with zero distractions, letting the craftsmanship speak for itself.
Lifestyle shots, on the other hand, are all about creating a vibe. Think about showing a necklace as part of a layered look, or a set of rings resting on a beautiful, textured piece of linen. You’re not just selling a product; you're selling an aesthetic, a moment. This helps potential buyers imagine wearing the piece themselves, which is an incredibly powerful sales tool.
The Art of Thoughtful Composition
Composition is just a fancy word for arranging things in the frame to guide the viewer’s eye. It’s not as complicated as it sounds, and a few simple principles can take your photos from "nice" to "wow."
One of the oldest tricks in the book is the rule of thirds. Picture a tic-tac-toe grid over your viewfinder. Instead of plunking the jewelry right in the middle square, try placing it along one of the lines or where two lines cross. It's a tiny shift, but it instantly makes the photo feel more balanced and dynamic.
Another one of my favorites is using leading lines. You can use props—a flowing ribbon, the edge of a book, even a soft shadow—to create a visual path that leads the eye straight to the jewelry. This makes your composition feel deliberate and draws attention exactly where you want it.
The infographic below breaks down the technical settings that give you the control needed to execute these creative ideas.
Once you've mastered how aperture, ISO, and white balance interact, you're free to stop worrying about the camera and start focusing on the creative vision for your shot.
Small Details That Make a Big Impact
This is where the pros separate themselves from the amateurs. It’s all in the tiny details. Always, always handle jewelry with cotton gloves. Trust me, trying to edit out fingerprints is a nightmare you don’t want. I also keep a small can of compressed air on my table to blast away any last-second dust specks.
Perfecting the angle is a game of millimeters. Making tiny adjustments to how a ring is tilted or how a chain drapes can completely change how the light hits the piece, revealing the sparkle in a diamond or the texture of a metal band.
Don't rush this part. Nudge things around. Experiment. See what happens when you slightly change the angle. If you're feeling stuck, browsing through different jewelry photography ideas can be a great way to spark some new inspiration. Patience here is what turns a good photo into a truly breathtaking one.
Perfecting Your Images in Post Production
The click of the shutter feels like the finish line, but it’s really just the beginning of the final, crucial stage. Post-production is where you take a great raw photo and transform it into a stunning, commercial-ready image that drives sales.
Even with the most meticulous setup, tiny flaws always find a way in. We're talking about microscopic dust particles, faint scratches on the metal, or distracting reflections that you didn't notice on set. The editing process is your opportunity to meticulously polish these away, making sure nothing detracts from the jewelry itself.
The Essential Editing Workflow
Having a consistent editing process is a lifesaver. It not only saves you a ton of time but also ensures every product photo on your site looks like it belongs to the same professional collection.
The first order of business is always color. You have to get it right. An 18-karat gold ring needs to look like 18-karat gold, and the rich blue of a sapphire can't look washed out or artificially bright.
From there, you’ll want to create that clean, uniform background. For almost all e-commerce, the gold standard is pure white (#FFFFFF). This means carefully cutting the jewelry out from its original background, a step that makes the product pop and gives your online store a crisp, cohesive feel.
Post-production isn't about altering the jewelry; it's about removing distractions so the piece's true quality can shine through. Every single edit should be in service of presenting the item as accurately and beautifully as possible.
Advanced Retouching and Polishing
With the fundamentals in place, you can dive into the finer details—the kind of advanced work that really separates a good photo from a great one.
- Removing Imperfections: This is where you zoom way in. Using tools like the clone stamp or healing brush, you'll meticulously remove any lingering dust, smudges, or tiny scratches.
- Controlling Reflections: Even with perfect lighting, some reflections are unavoidable. A skilled retoucher can gently soften or even completely remove these, giving metal surfaces that clean, flawless look.
- Enhancing Sparkle: The goal here is to make gemstones come alive. You can selectively brighten the facets of a diamond or colored stone to amplify its natural brilliance without making it look artificial or over-edited.
This kind of manual retouching is an art form that requires a lot of patience and skill. If you want to get into the weeds of these techniques, our detailed guide on how to edit product photos is a great place to start.
The Rise of AI in Photo Editing
As powerful as manual editing is, it's also incredibly time-consuming. This is where modern technology is really changing the game. AI-powered editing tools are now smart enough to handle tedious tasks like background removal and basic retouching automatically.
This new wave of technology allows photographers to get consistent, high-quality results with amazing efficiency. Imagine an AI that can intelligently identify and remove unwanted reflections, enhance the clarity of a gemstone, and make sure every piece of metal has the perfect shine. It frees you up to focus on the more creative parts of your business.
QuickPixel pushes this idea even further by using sophisticated AI to manage the entire editing workflow. You can simply upload your raw photos and get back perfectly polished images—complete with clean backgrounds, corrected colors, and flawless retouching—without ever opening an editing program. It’s a way to achieve professional consistency at scale, saving you countless hours of painstaking work.
Your Top Jewelry Photography Questions, Answered
Even with the best guide, you’re bound to run into a few head-scratchers when you get behind the camera. It happens to everyone. Let's tackle some of the most common questions that pop up when you're just starting out, from fighting those pesky reflections to figuring out where your money is best spent.
How Do I Get Rid of Reflections?
This is the big one. You've set up your lights perfectly, but there it is—your own face or the camera staring back at you from a polished silver band. It’s the classic jewelry photography challenge.
The solution is all about diffusion and what we call "blocking." You need to surround your subject with a clean, neutral environment. Grab some large, white foam boards and strategically place them just outside the camera's view. Your goal is to build a little "room" of white around the piece so that the only thing it can reflect is a soft, neutral surface. It takes some fiddling, but it's the secret to those clean, professional shots.
Do I Really Need an Expensive Camera?
So many people get hung up on the camera body, but here’s a little secret from the pros: your lens is far more important. Seriously.
A razor-sharp 1:1 macro lens will do more for your image quality than the fanciest camera body ever will. If you’re working with a limited budget, put your money into a quality macro lens and decent lighting first. You can always upgrade the camera later.
Getting the Best Results on a Budget
Speaking of budgets, you absolutely don't need a high-end studio to produce stunning images. A little resourcefulness goes a long way.
- Smart Lens Choice: Can't swing a brand-name macro? Check out lenses from Sigma or Tamron. They make fantastic macro lenses that deliver incredible sharpness for a fraction of the cost. I've used them for years.
- Natural Lighting for the Win: Don't have studio strobes? No problem. A large window with soft, indirect sunlight can be your best friend. Hang a thin white sheet over it to act as a giant diffuser, then use a simple white reflector card to bounce some of that beautiful light back into the shadows.
- DIY Backgrounds: You don’t need a roll of expensive seamless paper. Just head to an art supply store and pick up a large sheet of white poster board. It’s cheap, effective, and gives you that clean, non-distracting background perfect for e-commerce.
I see it all the time: the biggest mistake isn't using cheap gear, it's a lack of patience. The magic happens in the tiny, incremental adjustments. Nudge a light, shift an angle, tweak the composition. That's how you get the shot.
The pressure for incredible jewelry images isn't going away. In fact, the global Jewelry Photography Services market is expected to balloon to $41,149 million by 2031, largely because of e-commerce. As the market grows, photographers are turning to smarter tools like AI background replacement and retouching to keep up. You can discover more insights about these jewelry photography trends and see how the industry is evolving.
Ready to bypass the steep learning curve and get flawless, studio-quality images right now? QuickPixel uses sophisticated AI to turn your photos into polished, professional assets ready for your online store or next marketing campaign. Get your professional product photos today.
Try QuickPixel Today
Get started with our AI-powered image generation tools