How to Start Selling on Amazon The Complete Guide

Starting an Amazon business really comes down to two major decisions right out of the gate: what kind of business you're going to run, and which seller plan makes sense for you. Nailing these foundational choices is everything—they'll shape your entire strategy, from how you find products to how you manage your profits.
Choosing Your Amazon Business Model
Before you get caught up in creating listings or shipping boxes, you need a solid game plan. How you decide to operate on Amazon is the most important first step, as it dictates your startup costs, what your day-to-day will look like, and your potential for growth down the road. Most sellers go down one of three main paths, each with its own set of pros and cons.
This infographic gives a great visual breakdown of the most common ways people sell on Amazon.
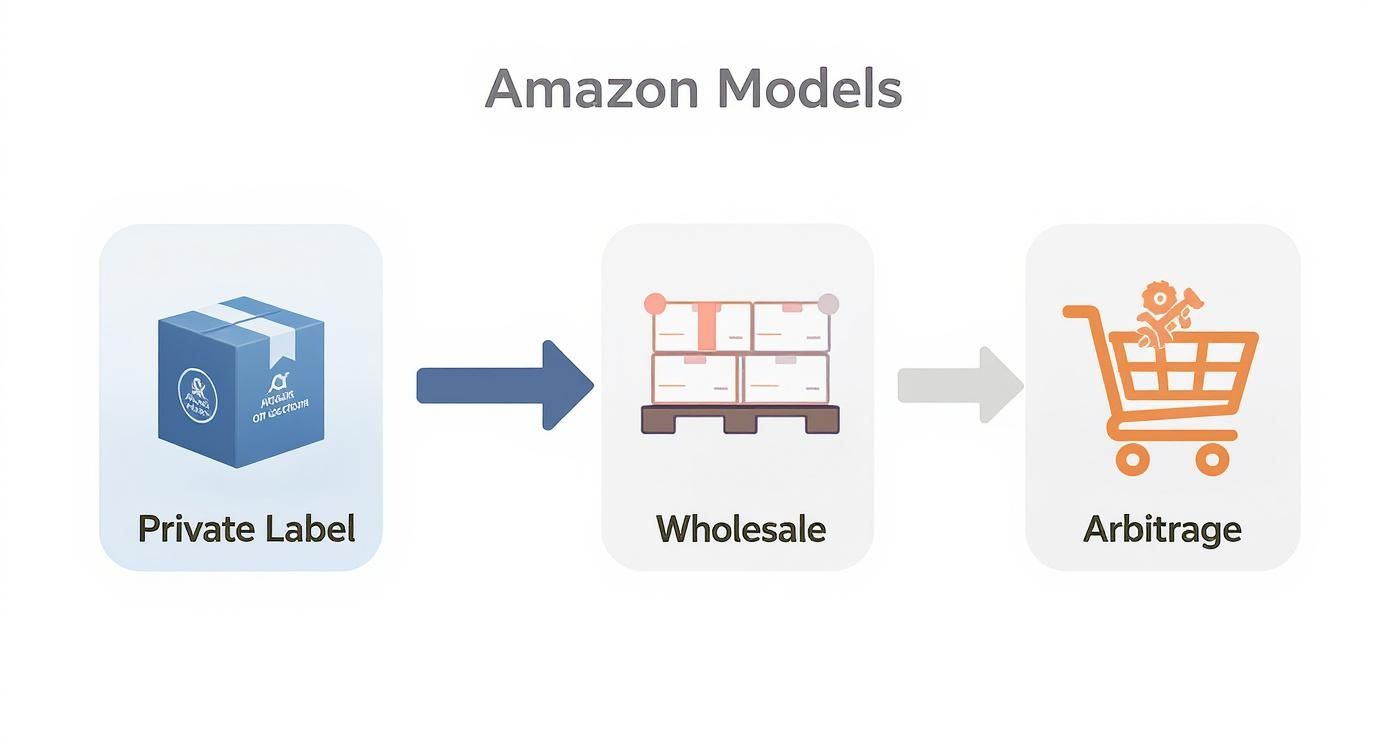
As you can see, each model—Private Label, Wholesale, and Arbitrage—takes a different tack on sourcing and branding. This directly affects how much control you have and the money you'll need to get started.
Find Your Selling Strategy
Figuring out the right model really depends on your budget, how much risk you're comfortable with, and how hands-on you want to be with your brand.
- Private Label: This is all about creating your own brand from scratch. You find a generic product, team up with a manufacturer to put your logo and packaging on it, and then you're the only one selling it on Amazon. This path offers the best profit margins and total control, but it also requires the most cash upfront for inventory and marketing. If this sounds like your route, a solid guide on launching your Amazon FBA private label is an absolute must-read.
- Wholesale: With this strategy, you're buying existing branded products in bulk from manufacturers or distributors at a discount. Then, you just resell them on Amazon. The big advantage here is that you’re selling products people already know and want, which saves you a lot of marketing headaches. The trade-off? The profit margins are usually thinner, and you’ll often be competing against other sellers on the very same product listing.
- Arbitrage (Retail & Online): This is the quickest and cheapest way to dip your toes in the water. Arbitrage is simply the art of finding discounted products in retail stores (that’s retail arbitrage) or on other websites (online arbitrage) and flipping them on Amazon for a profit. It’s super flexible and doesn’t require a big investment, but it's a real grind and can be tough to scale into a large business.
Key Takeaway: The best business model isn’t just about making the most money; it's about what fits your personal situation. An entrepreneur with a good chunk of capital might jump into Private Label, whereas someone starting out with just a few hundred dollars will find Arbitrage is a much more practical starting point.
Comparing Amazon Seller Plans Individual vs Professional
Once you have your business model picked out, the next step is to choose your seller plan. Amazon gives you two main options, and your choice will directly impact your fees and the tools you have at your disposal. This is a critical decision that affects your bottom line and your ability to scale.
To help you decide, here’s a quick breakdown of what each plan offers.
| Feature | Individual Plan | Professional Plan |
|---|---|---|
| Monthly Fee | $0 | $39.99 per month |
| Per-Item Fee | $0.99 for each item sold | $0 (no per-item fee) |
| Best For | Selling fewer than 40 items per month, testing ideas | Selling more than 40 items per month, serious business growth |
| Advertising | Not eligible to create ad campaigns | Eligible to create PPC campaigns (Sponsored Products, etc.) |
| "Featured Offer" | Not eligible to win the "Buy Box" | Eligible to win the "Buy Box" |
| Advanced Tools | Basic listing and order management | Access to advanced reports, APIs, and bulk listing tools |
| Restricted Categories | Cannot apply to sell in certain categories | Can apply to sell in restricted categories (e.g., Automotive) |
Essentially, the Individual plan is a pay-as-you-go deal. You only pay a fee when you sell something, which makes it perfect if you're just starting out, selling less than 40 items per month, or simply want to test the waters with a few products. It's a low-risk entry point.
On the other hand, the Professional plan is a must for anyone serious about building a real business. You pay a flat monthly fee, but you skip the per-item charge. More importantly, this plan unlocks the tools you absolutely need to compete, like running ads, accessing detailed sales data, and—crucially—becoming eligible to win the "Featured Offer" (what we all know as the Buy Box). If you plan to sell more than 40 items a month, the math alone makes the Professional plan the clear winner.
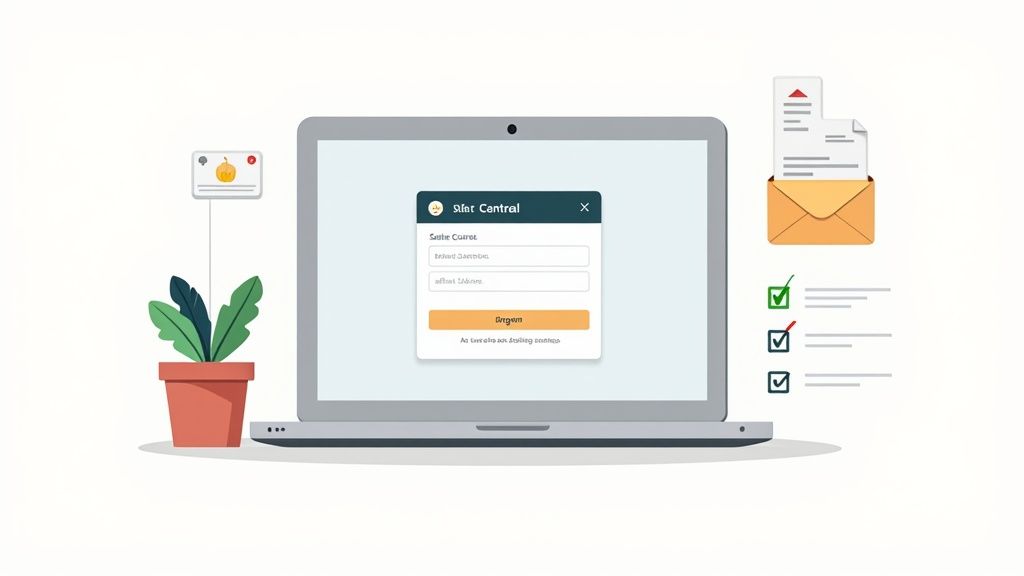
Getting Your Amazon Seller Account Set Up
You've picked your business model and a seller plan—now it's time for the fun part: creating your Seller Central account and bringing your Amazon store to life. This is where your journey truly begins, but honestly, it’s also where a lot of new sellers get stuck. Amazon's verification process can be a real hurdle, but a little bit of prep work makes all the difference.
Think of the registration process as Amazon doing a thorough background check on your business. They need to be absolutely sure you are who you say you are to keep their marketplace safe for everyone. I've seen countless sellers face delays, and almost every single time, it boils down to mismatched or incomplete documents. The secret to a smooth approval is having everything lined up before you even start.
Get Your Paperwork in Order First
Seriously, before you even navigate to the signup page, get all your documents gathered and scanned. The key here is consistency. Every name, address, and business detail needs to match exactly across every single piece of paper.
Here’s the checklist of what you'll need on hand:
- A dedicated business email address. Don't mix this with your personal inbox. Keep all Amazon communications in one place.
- An active credit card. This is how Amazon will bill you for your monthly Professional plan fee (if you chose that) and any other selling fees.
- Your bank account details. You'll need the account and routing numbers so Amazon knows where to send your money. The name on this account must match the name you're registering with, whether it's your personal name or your official business name.
- A government-issued ID. Have a clear, unexpired copy of your driver's license or passport ready to go. Again, the name must be a perfect match.
- Tax information. This will be your Social Security Number if you're a sole proprietor or your business's Federal Tax ID Number (EIN).
Having all of these scanned and saved as digital files will make the upload process a breeze.
Getting Through the Verification Gauntlet
Once you hit submit, your application goes to Amazon's verification team. This isn't just a quick glance; they are meticulously cross-referencing everything to ensure it's all legitimate. For example, they'll check if the address on your bank statement is the same as the business address you entered.
My biggest piece of advice: One of the most common hangups I see is a bad document submission. People upload a screenshot of their bank statement that cuts off their address, or they use a utility bill that's in a roommate's name. Always use official PDF statements from your bank, and make sure any document you provide is recent, typically from the last 90 days.
If Amazon comes back asking for more information, don't panic. Just respond quickly and give them exactly what they’re asking for. It can feel a bit tedious, but it’s a necessary step. A successful verification can take anywhere from a few days to a couple of weeks, so be patient.
Fine-Tuning Your Account Settings
You’re in! Congratulations. Before you rush to list your first product, take a few minutes to dial in your account settings. This is a small step that sets you up for success right from the start.
Head over to your account settings in Seller Central and knock out these key tasks:
- Set your return address. Make sure you have a valid address locked in for any customer returns.
- Fill out your business information. Flesh out your "About Seller" profile. It's a small thing that helps build trust with shoppers.
- Tweak your notification preferences. Customize your email alerts so you get the important stuff (like new orders or account health warnings) without getting spammed.
Getting these initial settings right means you can hit the ground running when your first listing is live. It clears the decks so you can focus on what really matters—making sales and growing your business.
How to Find Profitable Products to Sell
Let’s be honest: the entire foundation of your Amazon business rests on one thing. You need to sell a product people actually want to buy. Without a winning product, even the most brilliant marketing and business strategy will fall flat. This is where smart, data-driven product research becomes your most valuable skill, blending powerful software with some clever manual digging to find that sweet spot of high demand and low competition.
Forget just picking something you like. Profitable products are discovered, not just chosen. The process is all about digging into Amazon's own marketplace data to see what’s already selling, figuring out what frustrates customers, and then finding a way to do it better.

Uncovering Opportunities with Data
Your first stop should be Amazon’s own bestseller lists. Seriously. These pages are a goldmine, showing you what’s popular right now across every single category. Don't just glance at the top few products; dive deep into the subcategories to spot less obvious trends.
While you're browsing, look for products with a consistent Best Sellers Rank (BSR) under 5,000 in their main category. A stable BSR tells you there’s steady, reliable demand, which is far better than a product that’s just having a momentary spike in popularity.
This manual approach is great for getting a feel for the market, but to really get into the nitty-gritty, you'll need specialized tools. To make sure you're not just guessing, it's essential to explore some of the top Amazon product research tools to get a clear picture of sales data, keyword volume, and what your competitors are up to. These tools turn guesswork into a calculated strategy.
Characteristics of a Great Product to Sell
As you sift through potential ideas, it helps to have a mental checklist. A strong product candidate usually shares a few key traits that make it a much safer bet for a new seller.
Here’s what I look for:
- Small and Lightweight: This is huge. It keeps your FBA storage and shipping fees low, which directly protects your profit margins.
- High Demand, Low Competition: The dream scenario is finding products with thousands of monthly searches, but where the top sellers have fewer than 500 reviews. This signals an engaged audience with plenty of room for a new player.
- Room for Improvement: Go read the 3-star reviews on competitor listings. They are often filled with a roadmap of suggestions and complaints you can use to create a superior product.
- Year-Round Sales: Try to avoid overly seasonal items at first. A product that sells consistently all year, like kitchen gadgets or office supplies, gives you a much more predictable income stream.
A classic mistake is falling in love with a product idea before you've validated it. You have to let the data lead. If a product has low search volume and the top competitors are massive brands with thousands of reviews, it's a sign to move on, no matter how much you love the idea.
Analyzing Your Competition
Once you have a shortlist of potential products, it's time to play detective. You need to go deep into the listings of the top 5-10 competitors for your main keywords. The goal isn't to copy them—it's to find their weaknesses and exploit them.
Pay close attention to these areas:
- Listing Quality: Are their product photos blurry or unprofessional? Are their bullet points and descriptions totally generic? High-quality images and compelling copy are quick wins for a new seller.
- Customer Feedback: Like I said, reviews are a treasure map. What are customers consistently complaining about? If everyone says a product breaks easily or is missing a key feature, you’ve just found your unique selling proposition.
- Pricing Strategy: Check the price range of the top sellers. Can you source a similar product and price it competitively while still keeping a healthy profit margin? You should be aiming for 25-30% or more after all fees.
This deep dive is what truly validates your idea. It confirms that a market exists and shows you exactly how you can jump in with something that actually stands out.
Finding a Reliable Supplier
With a validated product idea in hand, you can finally think about sourcing. Finding a trustworthy manufacturer is absolutely critical—the quality of your product is entirely in their hands. For most private label sellers, platforms like Alibaba are the go-to starting point.
When you're vetting potential suppliers, don't just pick the cheapest one. Have a standard checklist of questions ready for every potential partner:
- What is your Minimum Order Quantity (MOQ)?
- Can you provide a sample so I can personally verify the quality?
- What are your payment terms? (Try to negotiate a split like 30% upfront and 70% on completion).
- What is the production lead time for my order?
- Are you a trading company or a direct manufacturer?
And please, always order a sample before you place a bulk order. It's a small investment that can save you thousands of dollars and a world of headaches by ensuring the product meets your standards before it ever reaches an Amazon warehouse. This careful process of research, analysis, and sourcing is how successful sellers get their start.
Creating Product Listings That Actually Convert
You've done the research, you've sourced your product, and now you’re at the moment of truth: the product listing. This is where the sale is won or lost. Think of your listing as your best salesperson, working 24/7 on the digital shelf. It has to be compelling enough to stop a casual scroller in their tracks and persuasive enough to turn them into a buyer.
I've seen fantastic products fail because of a lazy listing, and I've seen good products become bestsellers because of a truly killer one. This is where your hard work really starts to pay off.
Putting together a listing that converts is both an art and a science. You're balancing strategic keyword placement to get seen by Amazon's A9 search algorithm with persuasive copywriting that connects with a real human being. Getting this right isn't just a suggestion—it's absolutely essential for visibility and sales.
The Anatomy of a High-Converting Listing
A great product detail page is a symphony of several key parts working together. Each element has a job, from grabbing initial attention to sealing the deal right before a customer clicks "Add to Cart." Let’s break down what actually moves the needle.
- Product Title: This is your headline. It needs to be clear, descriptive, and stuffed with the most important keywords a shopper would use. Think brand, product type, key features, and quantity.
- Bullet Points (Key Product Features): This is where you sell the benefits, not just the features. Your job here is to solve customer problems and show them exactly why your product is better than the others.
- Product Description: Here's your chance to tell a richer story. Expand on your bullet points, talk about your brand's mission, and add any details that build trust and create desire.
- Product Images & Video: Visuals are king. High-quality, professional images build instant credibility and help shoppers imagine themselves using your product. Honestly, this might be the most important part of the entire listing.
- Backend Keywords: These are your "secret" keywords entered in Seller Central. They're invisible to customers but are indexed by Amazon, giving you a chance to rank for a much wider net of search terms.
If any one of these parts is weak, the whole listing suffers. A bad title means fewer people even see your page, while poor images will kill a sale instantly, no matter how brilliant your copy is.
Writing Titles and Bullets That Sell
Your product title is the very first thing a shopper sees in the search results. A title like "EcoFresh Glass Water Bottle with Bamboo Lid, 32oz, BPA-Free, Leakproof for Gym & Travel" is infinitely better than just "Water Bottle." It immediately answers key questions and is loaded with terms people are actually searching for.
Then you have your bullet points—this is your prime real estate for persuasion. Always frame them around a customer benefit. Don’t just say, "Made with borosilicate glass." Instead, try something like, "Enjoy Pure-Tasting Water from durable, stain-resistant borosilicate glass that never leaches chemicals or odors." See the difference?
Pro Tip: Go read the 1 and 2-star reviews of your top three competitors. This is a goldmine of customer pain points. If everyone complains that a rival's bottle leaks, you better believe "leakproof" should be a major theme in your own copy.
The Undeniable Power of Professional Photography
On Amazon, your photos are your product. Shoppers can't touch it, hold it, or test it out, so your images have to do all the heavy lifting. Grainy, poorly lit phone pictures scream "amateur" and can obliterate a customer's trust in seconds.
Investing in high-quality photography is one of the highest-ROI activities you can do as a new Amazon seller. Period.
Your image stack should show the product from multiple angles, use text callouts to highlight key features, and include "lifestyle" shots of the product in its natural habitat. A photo of your water bottle on a yoga mat or a busy office desk tells a much more powerful story than a simple white-background shot can on its own. Getting the main image right is especially critical, as it’s the first impression you make. To make sure you’re following the rules and standing out, check out these specific Amazon main image requirements that can make or break your click-through rate.
Optimizing for Amazon's Search Algorithm
Beyond what the customer sees, you have to feed the beast: Amazon's A9 algorithm. This process starts with deep keyword research to identify every relevant term for your product, from the main "head" terms to the more specific long-tail variations.
Once you have your list, you need to use them strategically:
- In your title, with the most important keywords positioned toward the front.
- Throughout your bullet points and description, weaving them in so they read naturally.
- In the backend keyword fields inside Seller Central. This is the perfect spot for terms you couldn't fit in your main copy, like common misspellings or synonyms.
Another crucial step is choosing the right product category. Placing your product in the most specific, relevant subcategory helps Amazon understand what you're selling, which makes it far easier for the algorithm to show it to the right shoppers. A fully optimized listing is the engine that will drive your entire Amazon business forward.
Mastering Your Fulfillment Strategy with FBA
How you get products into your customers' hands is just as critical as the quality of the product itself. This is your fulfillment strategy, and for the vast majority of Amazon sellers, Fulfillment by Amazon (FBA) is the way to go.
With FBA, you ship your inventory in bulk to Amazon’s massive warehouses. From there, they take over completely—storing, picking, packing, and shipping everything out. They even handle customer service and returns for those orders.
Think of it this way: you're essentially handing off your entire logistics operation to Amazon. This is huge. It frees you up to concentrate on the things that actually grow your business, like sourcing new products and dialing in your marketing, instead of spending your nights packing boxes.
Even better, using FBA makes your products eligible for Amazon Prime. This isn't just a nice-to-have; it's a massive competitive edge. Shoppers instinctively trust the Prime badge, and many won't even look at products that don't have it.
What the FBA Process Actually Looks Like
Getting set up with FBA involves a few crucial steps, and it pays to get them right from the start. First, you have to prep your products according to Amazon's very specific guidelines. These aren't just suggestions—they're strict requirements to make sure your inventory gets checked in without a hitch.
Here’s a quick rundown of what that prep work usually includes:
- Labeling: Every single unit needs a unique FNSKU barcode. This is non-negotiable, as it’s how Amazon tracks the product back to your account.
- Packaging: Got something fragile? It better be in bubble wrap. Selling a 3-pack of spatulas? They need to be securely bundled together so they’re sold as a single unit.
- Poly Bagging: Things like t-shirts, plush toys, or anything with an exposed surface will need a clear poly bag, complete with a suffocation warning label.
Once your products are prepped and ready, you create a shipping plan inside Seller Central. This is where you detail exactly what you're sending and how many units. Amazon’s system then works its magic, telling you which fulfillment centers to ship your boxes to. Don't be surprised if it splits your shipment across multiple warehouses; they do this to strategically place your inventory closer to customers across the country for faster delivery.
My Two Cents: Don't rush the prep phase. Seriously. One tiny mistake, like a smudged barcode or forgetting a suffocation warning, can get your entire shipment rejected. That means costly delays, return shipping fees, and a whole lot of frustration.
Breaking Down the FBA Fees
Naturally, all this convenience isn't free. Getting a handle on FBA fees is absolutely essential if you want to price your products for actual profit.
The two main fees you’ll always see are the fulfillment fee (a per-unit charge that covers picking, packing, and shipping) and the monthly inventory storage fee (which is based on the physical space your products take up).
Jumping into the Amazon marketplace can feel like a lot at first, but the potential is enormous. The smart play for new sellers is to understand the landscape and lean on powerful tools like FBA. In fact, over 82% of sellers use it to handle their logistics. If you're curious, you can dive into more Amazon FBA statistics to see how other sellers are finding success.
Knowing these costs before you set your price lets you calculate your real profit margin. It helps you avoid the classic rookie mistake of pricing too low and ending up with no profit. While the fees might seem like a lot on paper, the trade-off is almost always worth it for anyone serious about how to start selling on Amazon. Access to Prime customers and a completely hands-off logistics system is a tough combination to beat.
Giving Your First Product a Powerful Launch
You’ve built a fantastic product listing, and that’s a huge win. But a great listing sitting by itself won't make sales. Now comes the real test: getting it in front of shoppers and convincing Amazon's algorithm that you've got a hit on your hands.
Think of it like launching a rocket. You need an enormous, concentrated burst of energy right at the start to break free and get into orbit. For your product, that initial energy comes from a surge of early sales, a steady stream of positive reviews, and smart, targeted advertising.
The All-Important "Honeymoon Period"
When you first launch a product, Amazon gives it a little extra attention. This "honeymoon period" is a temporary visibility boost where the A9 algorithm watches your listing like a hawk. What happens in these first few weeks can make or break your product's long-term success.
Strong sales and a high conversion rate right out of the gate signal to Amazon that shoppers want what you're selling. This is your prime opportunity to climb the search rankings. You absolutely need a detailed plan for this window. To make sure you don't miss a single step, our product launch checklist template can be a lifesaver.
How to Get Your First Reviews (Without Breaking the Rules)
On Amazon, social proof is king. A product with zero reviews feels like a gamble to most shoppers. Your first mission is to land a handful of honest, legitimate reviews as soon as possible to build that initial trust.
Here are a few safe and effective ways to do it:
- Amazon Vine: If you’re Brand Registered, this is your best bet. You enroll a product, and Amazon sends it for free to a hand-picked group of trusted reviewers called Vine Voices. They're known for leaving thorough, unbiased feedback.
- The "Request a Review" Button: This is Amazon's official, built-in tool. Head to any order's detail page in Seller Central and click the button. It sends a generic, policy-compliant email asking the customer for both a product review and seller feedback. It's simple, safe, and surprisingly effective.
- Product Inserts: A small, well-designed card inside your packaging can go a long way. Just thank the customer for their purchase and gently ask them to share their experience on Amazon. But be careful: never, ever offer an incentive for a review. That’s a fast track to getting your account suspended.
Kicking Off Your First Amazon PPC Campaign
Paid ads are the quickest way to get eyeballs on your brand-new listing. For a launch, Amazon Pay-Per-Click (PPC) ads—specifically Sponsored Products—are non-negotiable.
Don't overcomplicate it at the start. Your best move is to begin with an Automatic Targeting campaign. Just set a budget and let Amazon do the work. It will show your ad to shoppers using search terms and products it thinks are relevant. This is an incredible tool for data mining; it will uncover exactly how real customers are searching for products like yours.
Let that auto campaign run for a week or two. Then, dive into the search term report. Find the keywords that are actually leading to clicks and sales, and move those winners into a Manual Targeting campaign. This is where you can take control, set specific bids, and really start to fine-tune your ad spend for profitability.
Key Insight: A strong launch is an investment in your product's future. The sales velocity you generate from PPC and promotions doesn't just put money in your pocket today—it boosts your organic ranking, which creates a snowball effect of more visibility and more sales down the line.
Using Promotions to Spark Early Sales
Sometimes, all a hesitant shopper needs is a little nudge. Promotions and coupons are perfect for providing that final push.
In Seller Central, you can easily create coupons that show up as a bright orange badge next to your price in the search results. It’s a simple visual cue that immediately grabs attention and makes your offer more compelling than the competitor's next to it.
Remember, you're tapping into a massive global marketplace. Amazon ships products to over 130 countries and has a customer base exceeding 310 million people. With daily sales revenue hitting around $1.75 billion, a well-executed launch strategy is your key to carving out a piece of that pie. You can learn more about Amazon's market dominance at eDesk.com.
Common Questions from New Amazon Sellers
Diving into the world of Amazon FBA for the first time? It’s natural to have a few questions swirling around. I’ve seen countless new sellers get hung up on the same couple of points, so let's clear the air on those right now.
One of the biggest questions I hear is, "How much does it really cost to get started?" You can launch a Professional account for $39.99 a month, which is what most serious sellers do. But if you just want to test the waters, the Individual plan has no monthly fee—you just pay a small fee per sale. It’s a great, low-risk way to get your feet wet.
Another frequent hang-up is the business license. "Do I need an LLC right away?" The short answer is, it depends on your local laws, but many sellers begin as sole proprietors. You can always formalize your business structure as you grow.
And speaking of growth, that's the name of the game. Once you're up and running, your focus shifts to gaining traction. For some proven tactics on that front, check out our guide on how to increase product sales.
Ready to make your products stand out? Let QuickPixel transform your photos into high-converting, professional images. Get started today at https://quickpixel.co.
Try QuickPixel Today
Get started with our AI-powered image generation tools